Create a Reach campaign – GOCare Reach
Quick Summary
This article walks through the process of building and scheduling a subscriber messaging campaign using GOCare Reach. It includes steps for configuring templates, uploading contact lists, setting tags, and deploying campaigns.
Accessing the Reach campaign tool
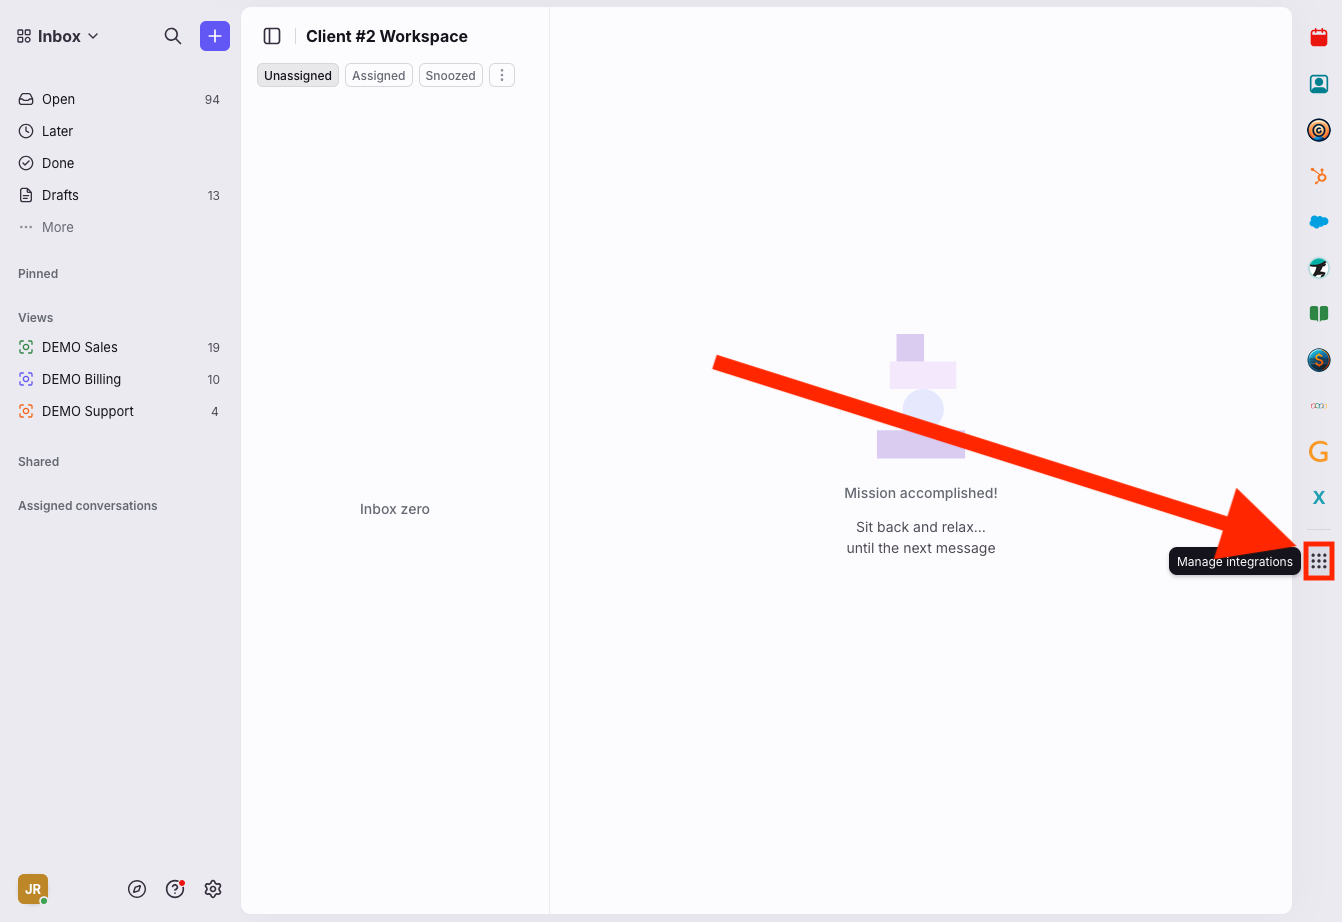
Before launching a campaign, ensure the GOCare Reach plugin is visible in your interface.
Click the Manage icon in the right sidebar.
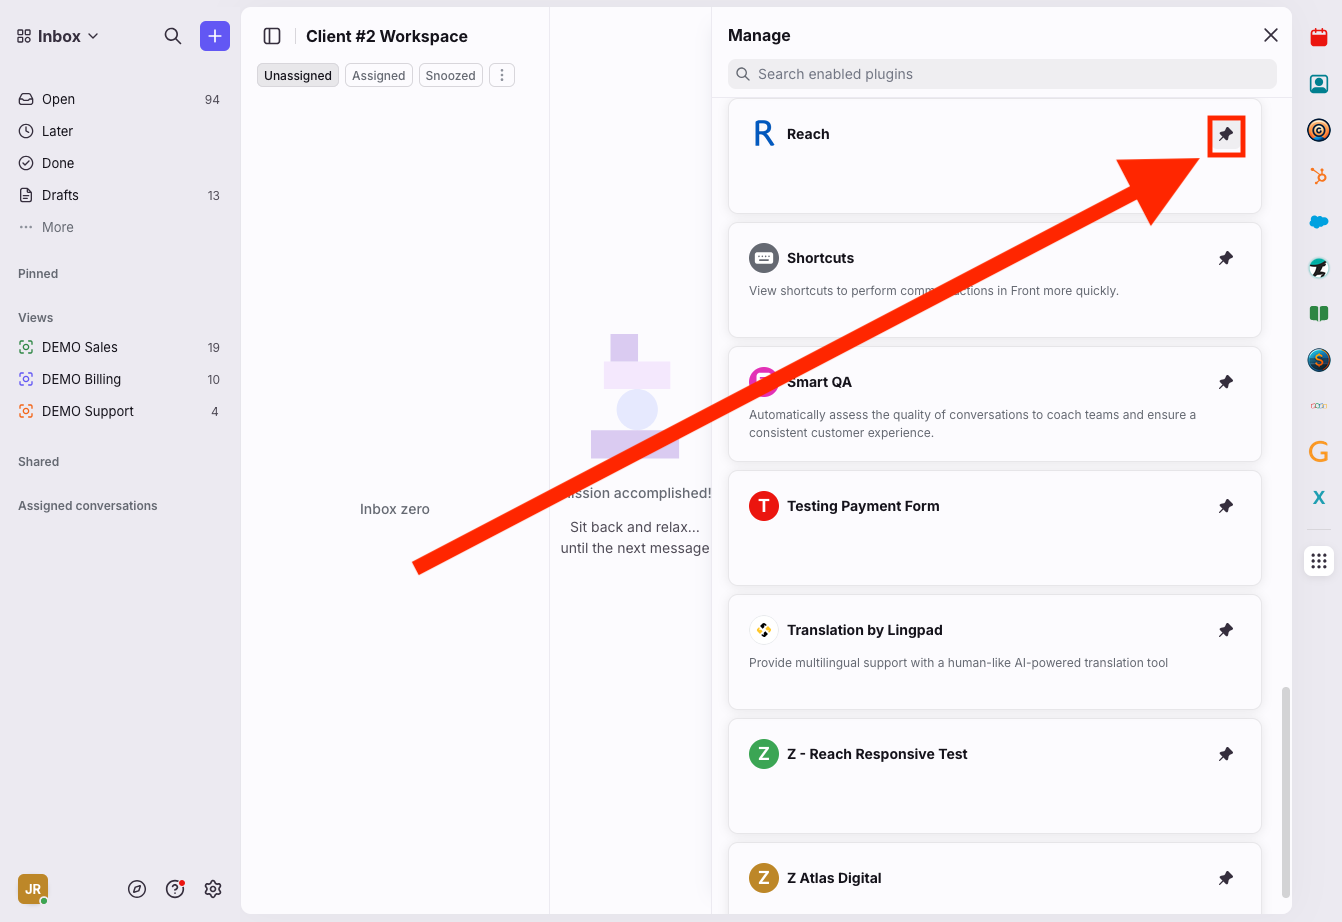
Locate GOCare Reach in the list of plugins.
Click the pin icon to add it to your sidebar, then close the manage panel.
💡Tip: Only users with an assigned Reach seat will have the ability to pin Reach to their sidebar for quick access. If the Reach icon does not appear, the user should contact their GOCare administrator to confirm their access level.
Step 1: Set up your message template
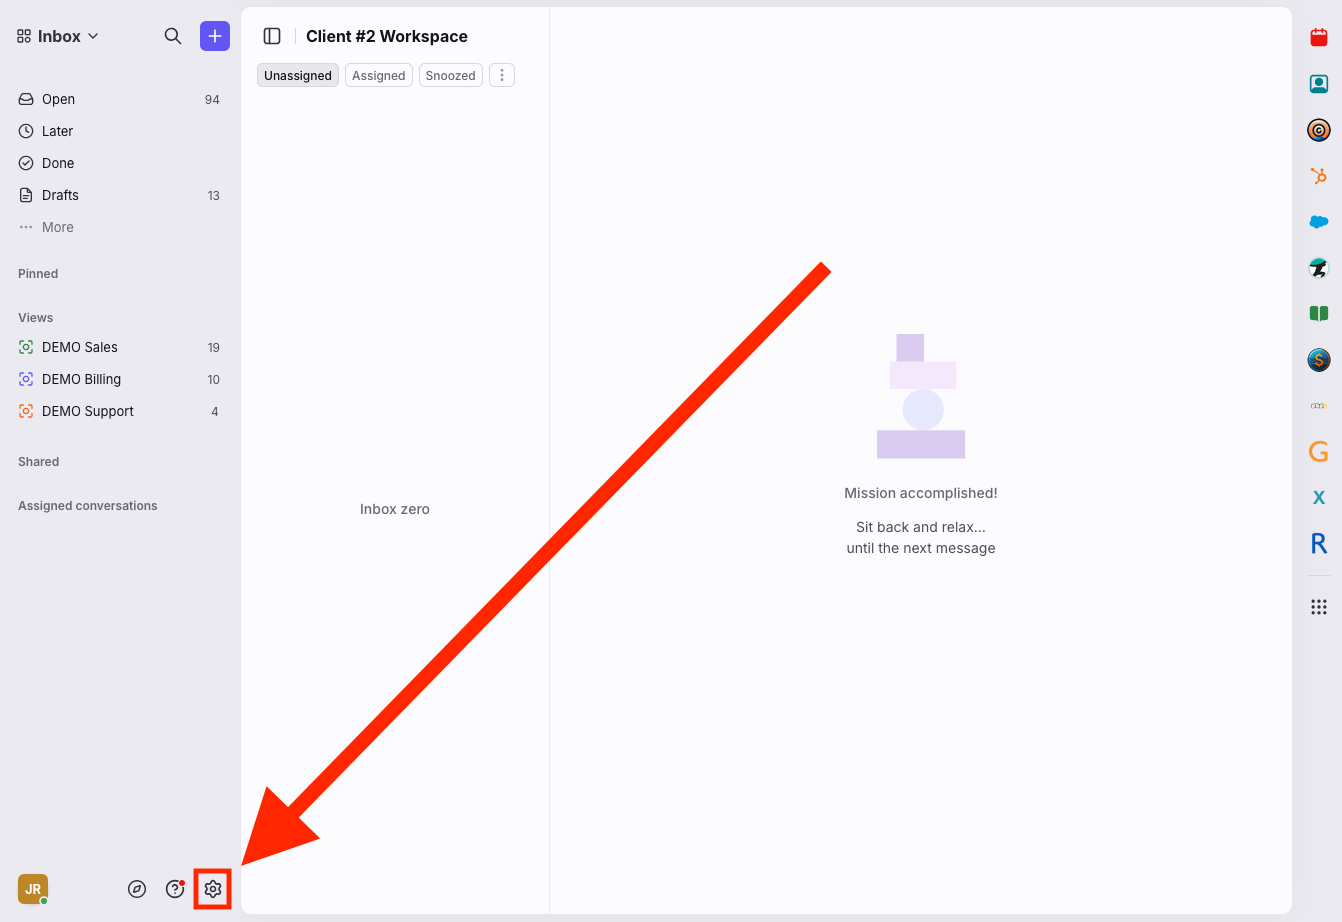
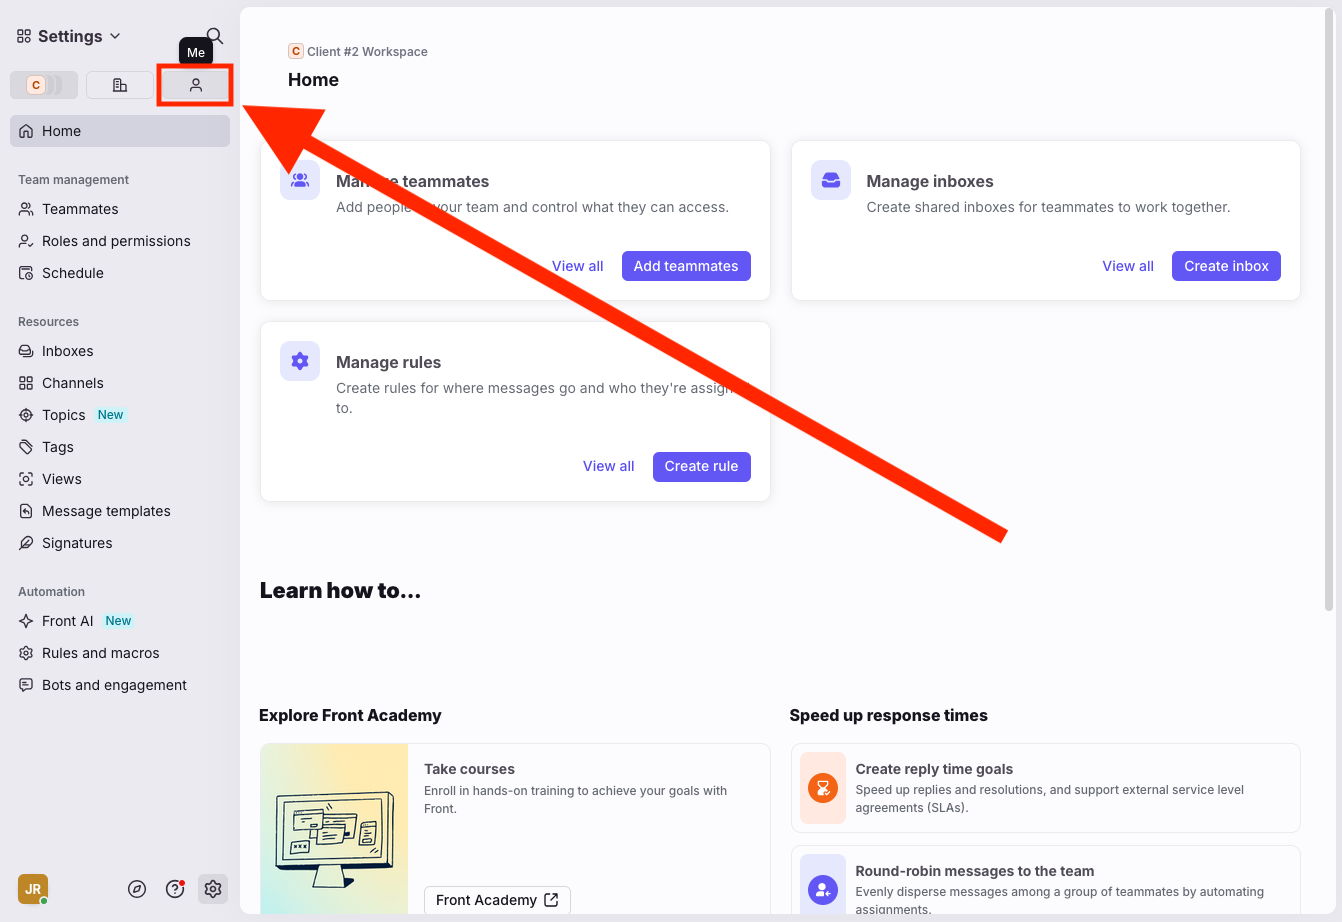
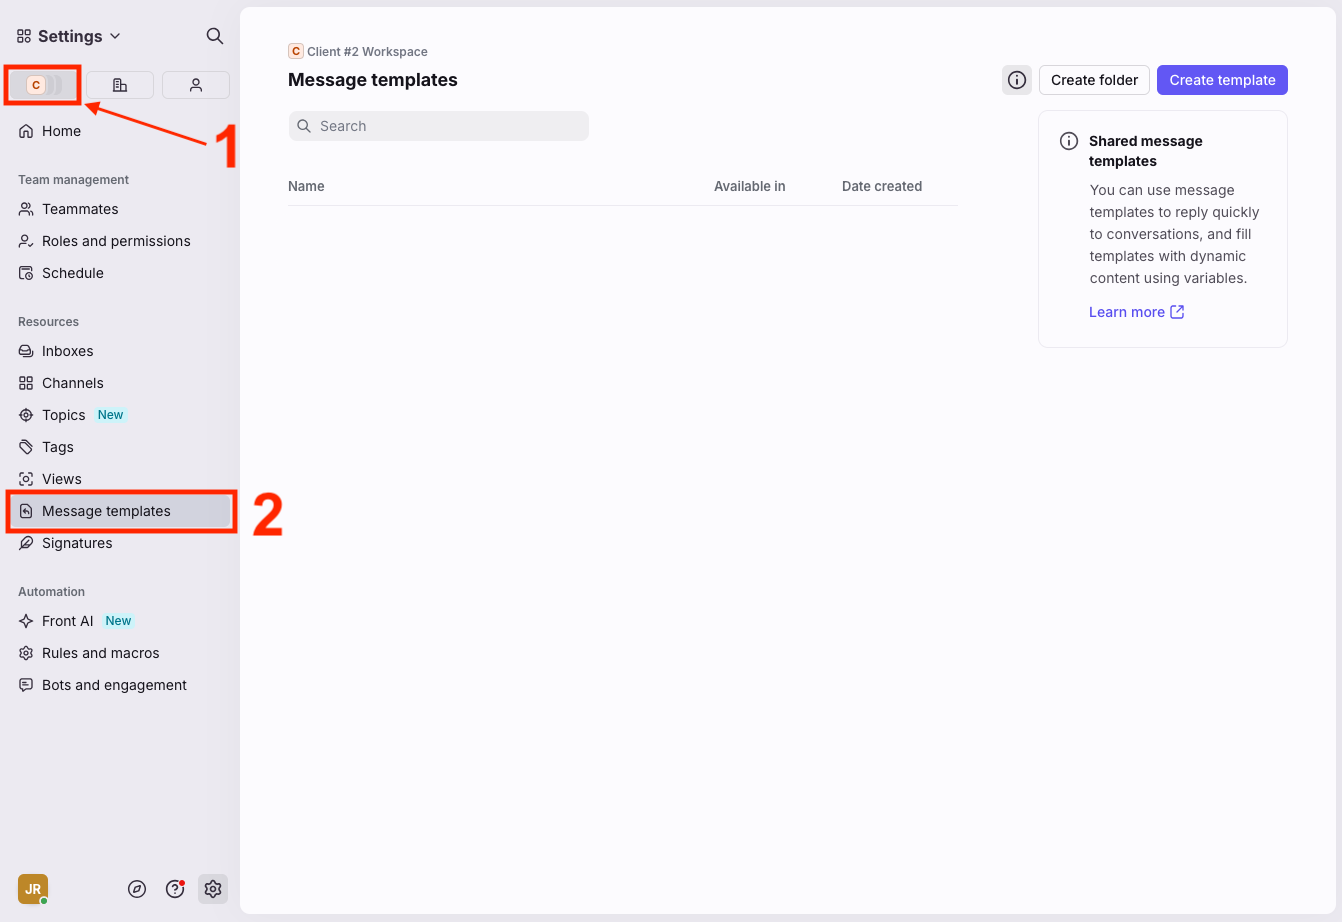
Click the Settings gear in the bottom left.
Select "Me"
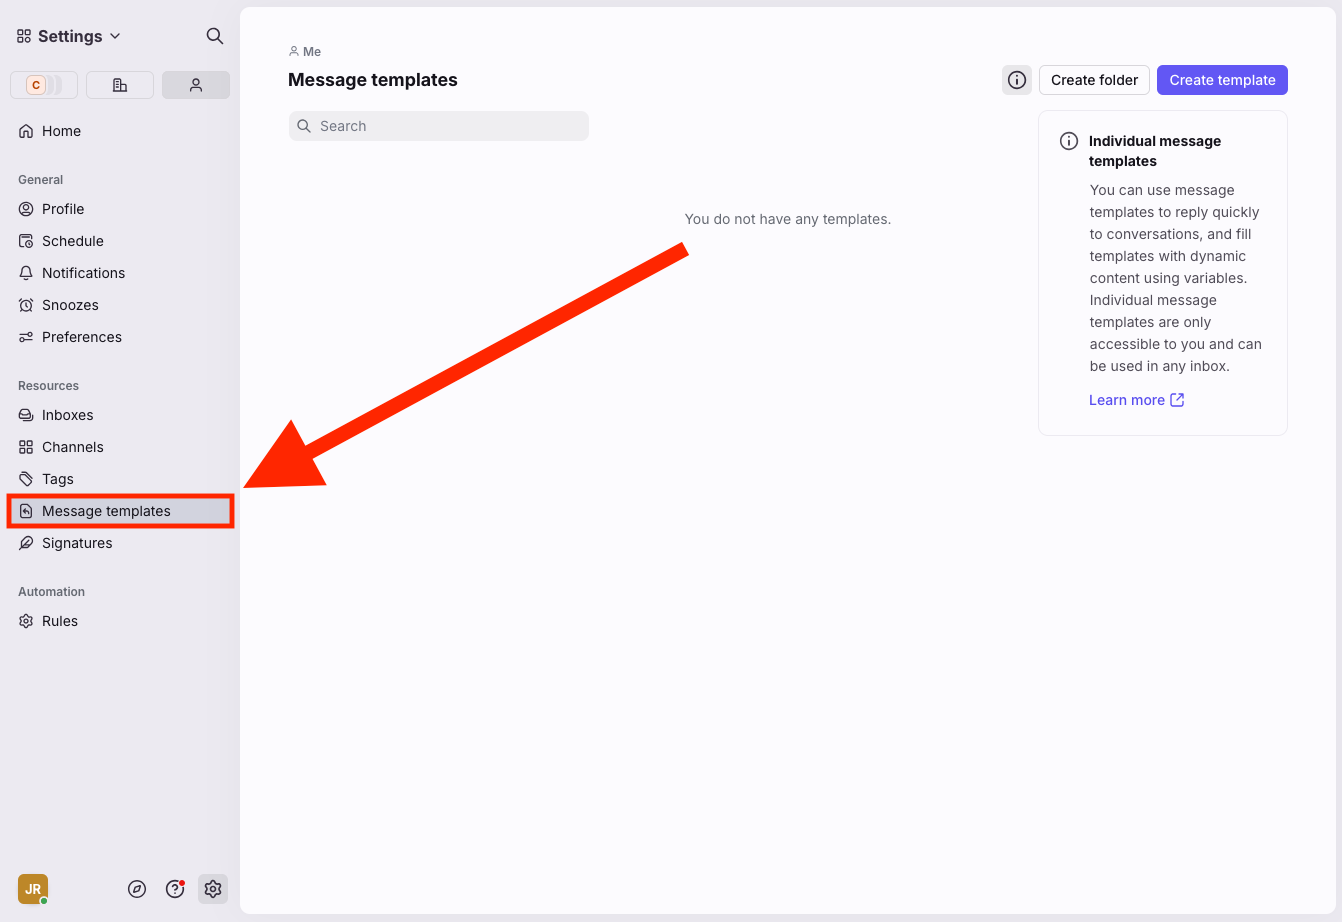
Select Message Templates.
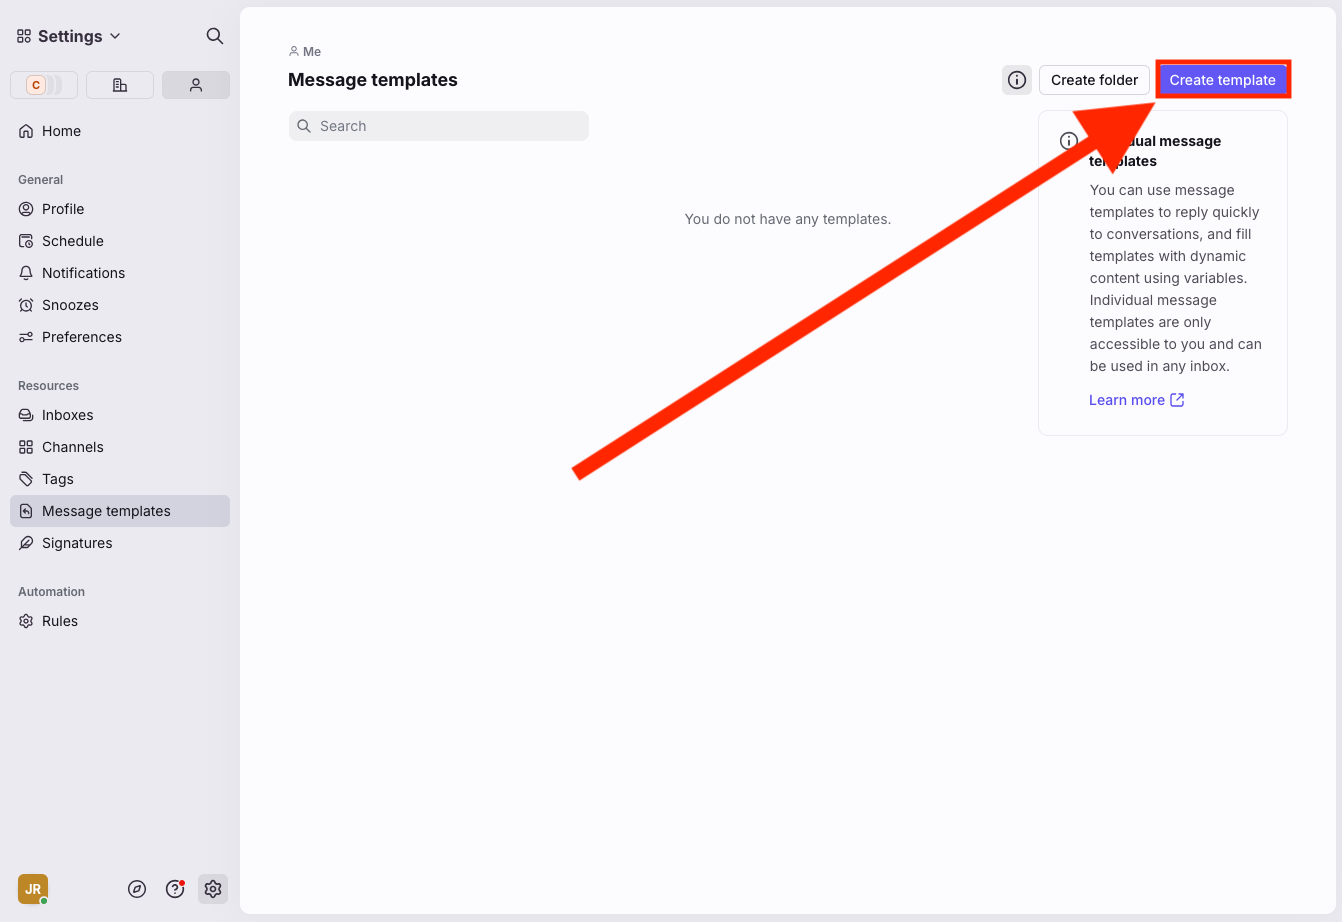
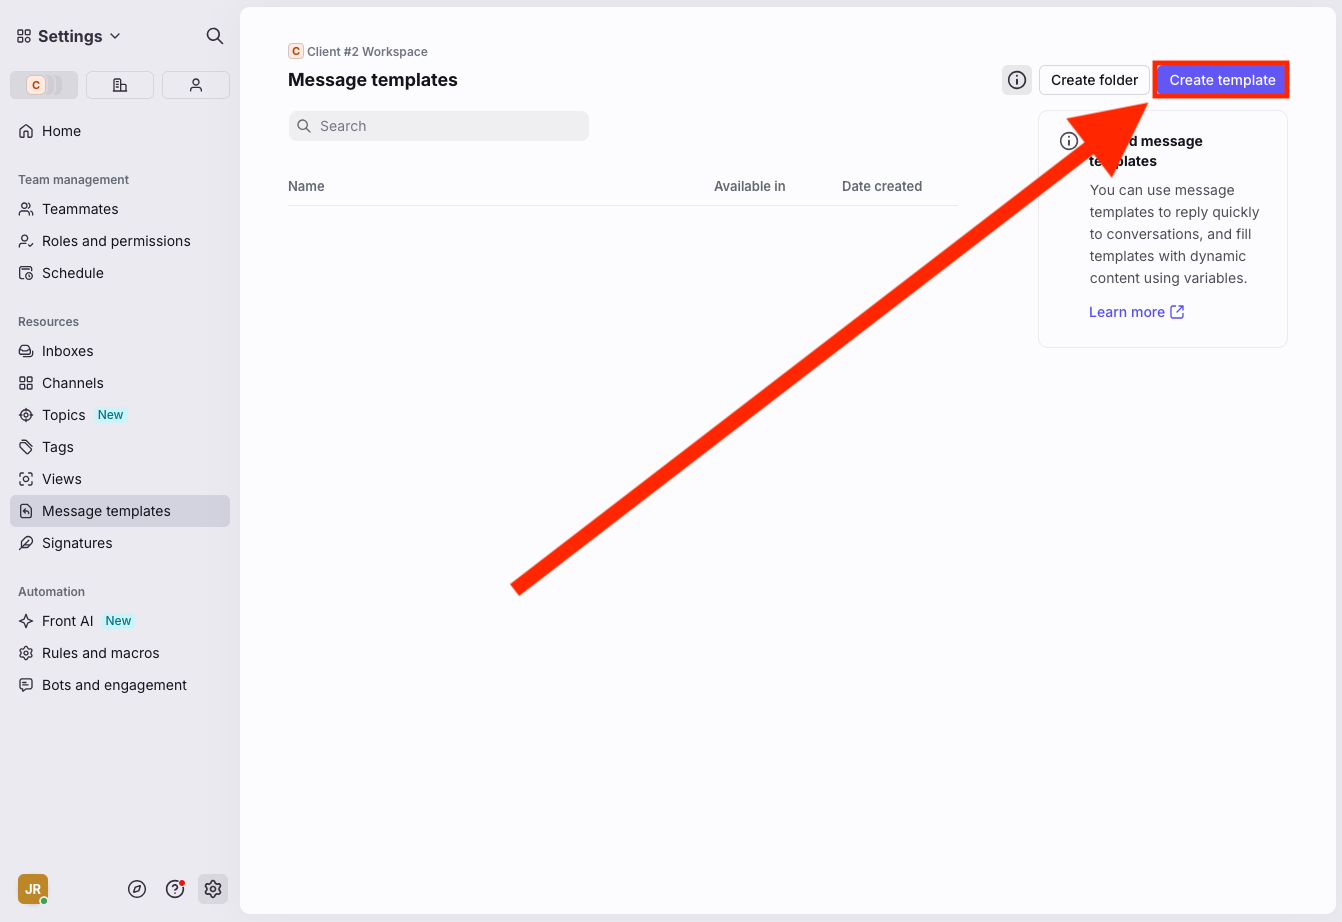
Click Create template.
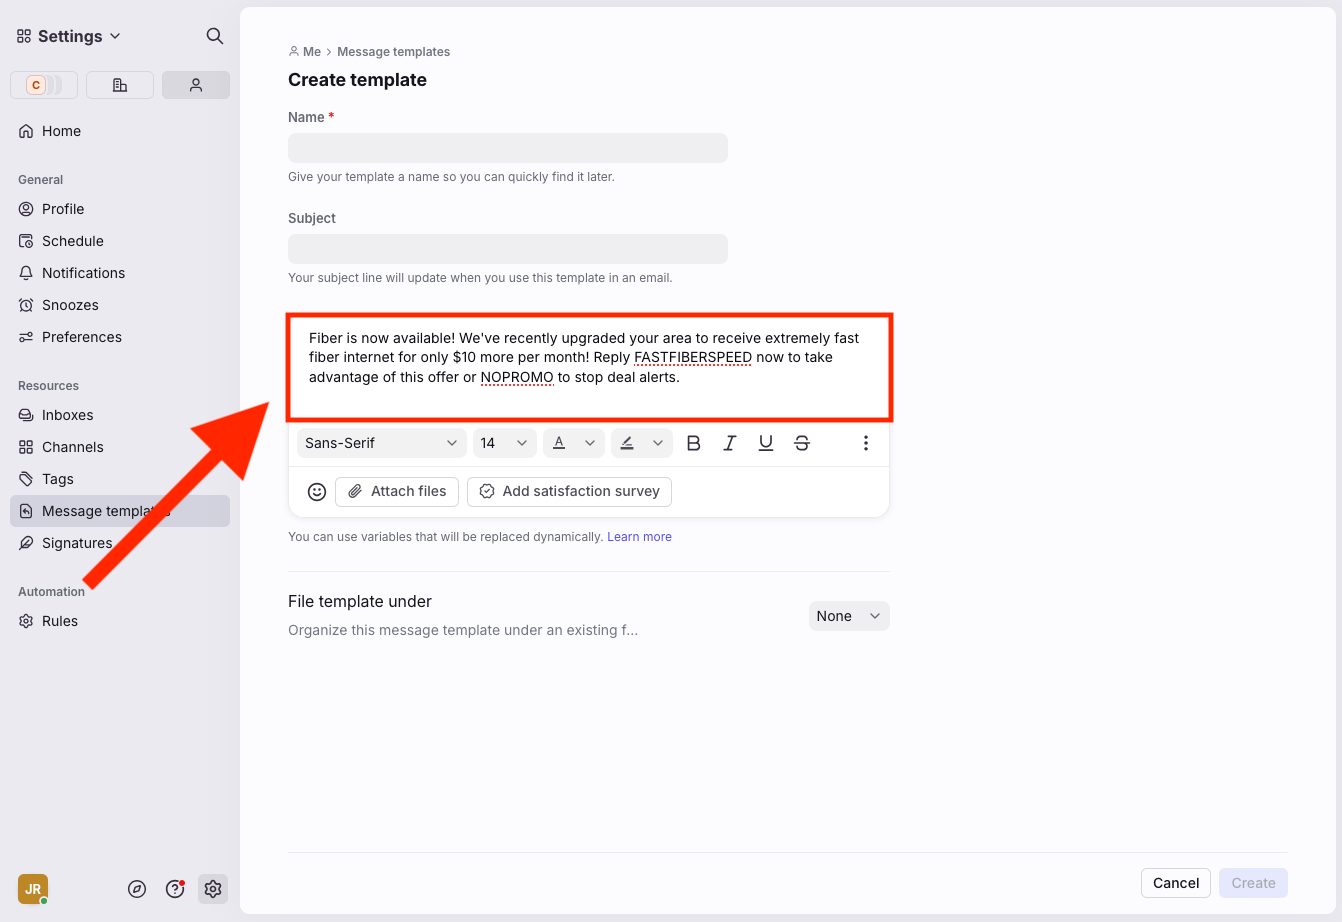
In the Message field, write your campaign message. Note: Email campaigns allow for text formatting and file attachments; SMS campaigns do not.
⚠️ Important: SMS messages must not include line breaks created with the return key.
For example, an email campaign might be formatted with extra spacing:
"Fiber is now available!
We've recently upgraded your area to receive extremely fast fiber internet for only $10 more per month!
Reply FASTFIBERSPEED now to take advantage of this offer or NOPROMO to stop deal alerts."
For SMS, the same message must be sent as one continuous block without returns:
"Fiber is now available! We've recently upgraded your area to receive extremely fast fiber internet for only $10 more per month! Reply FASTFIBERSPEED now to take advantage of this offer or NOPROMO to stop deal alerts."
As a general guideline, text messages are recommended to be 160 characters or less.
In the Name field, give your template a clear and descriptive name (e.g., Spring 2025 Campaign - SMS).
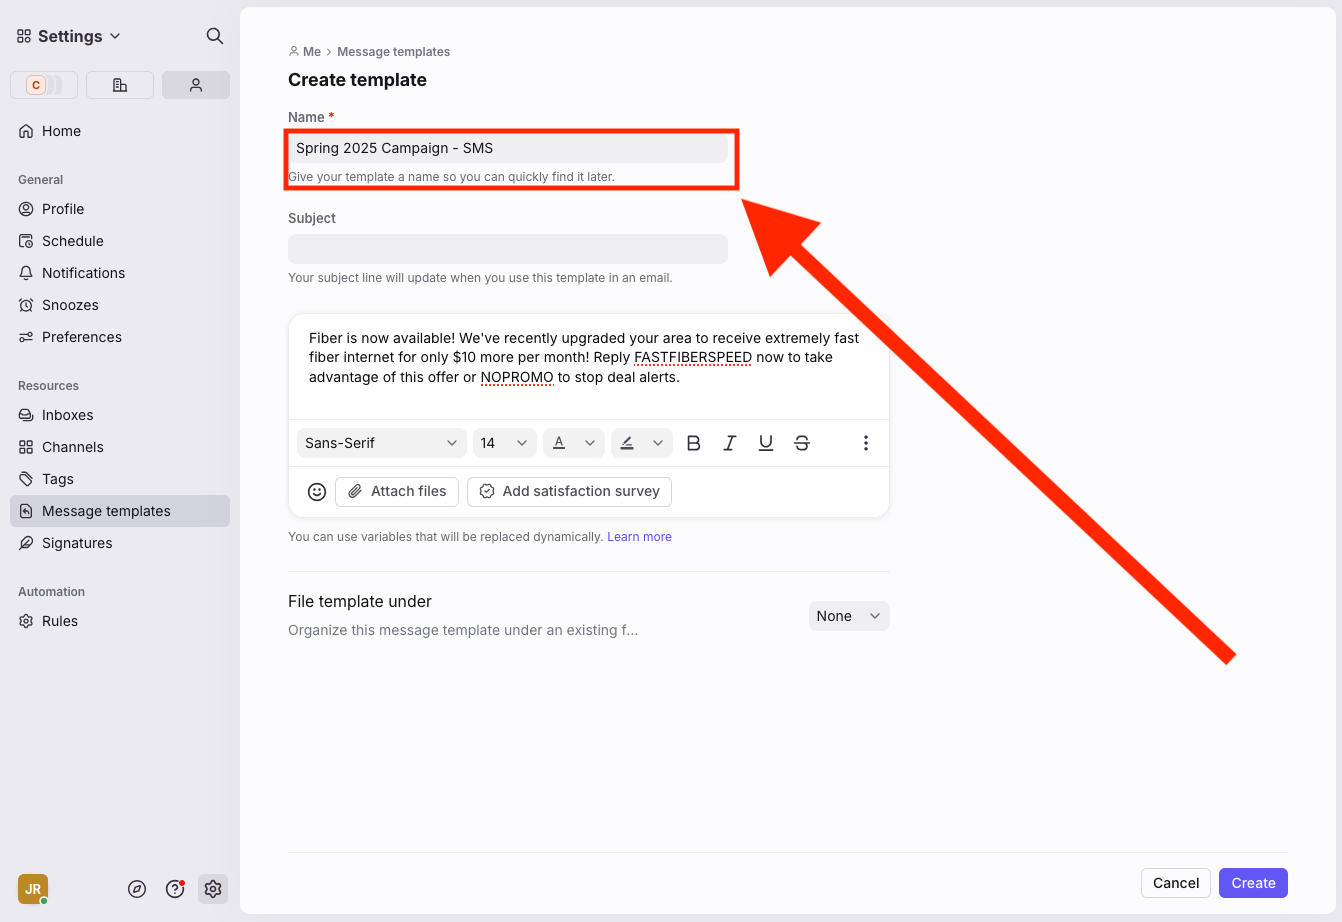
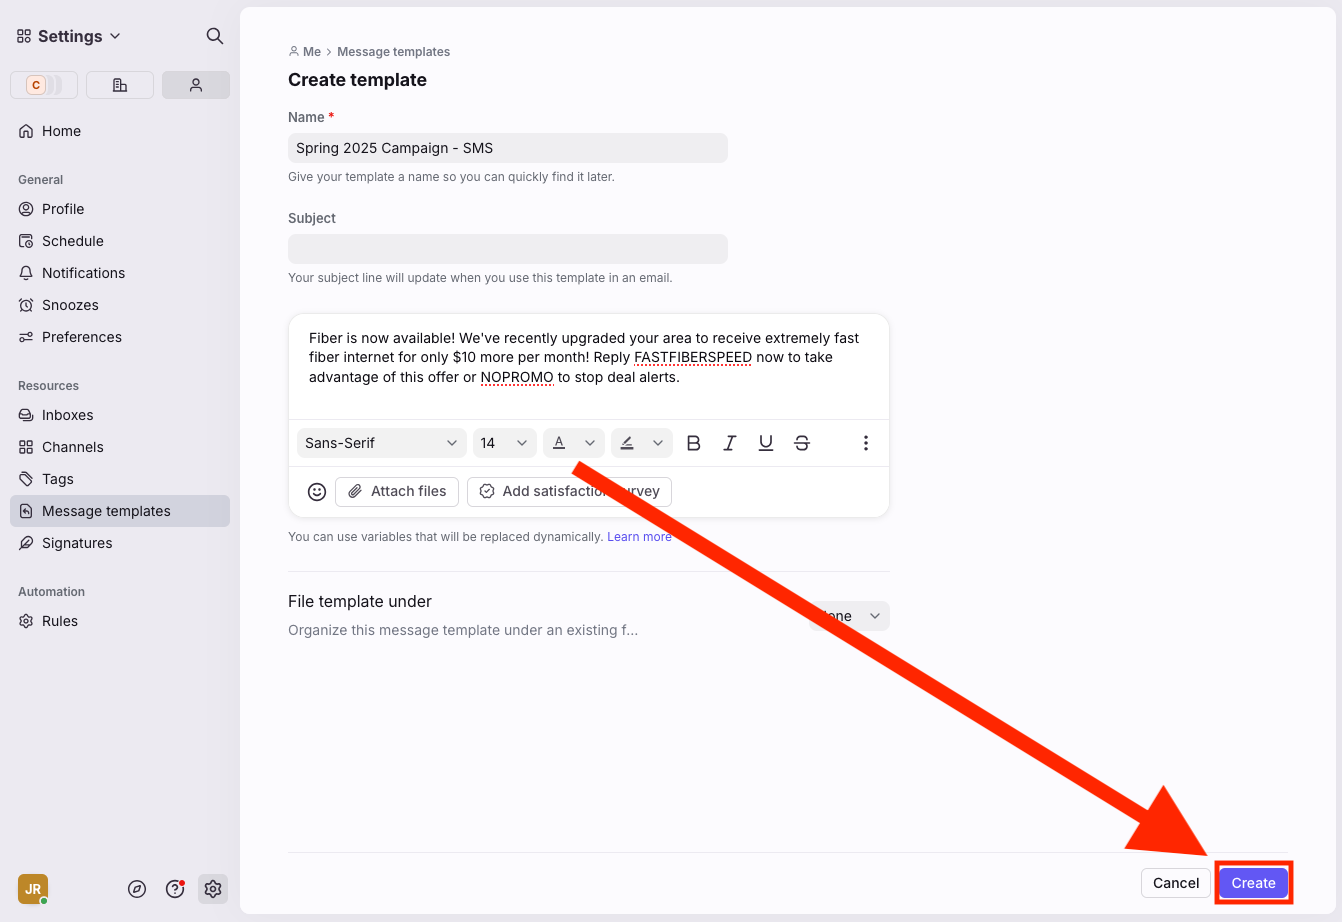
Click Create to save your template.
💡 Tip: Include specific keywords or identifiers in the template name so it’s easy to locate later when scheduling the campaign.
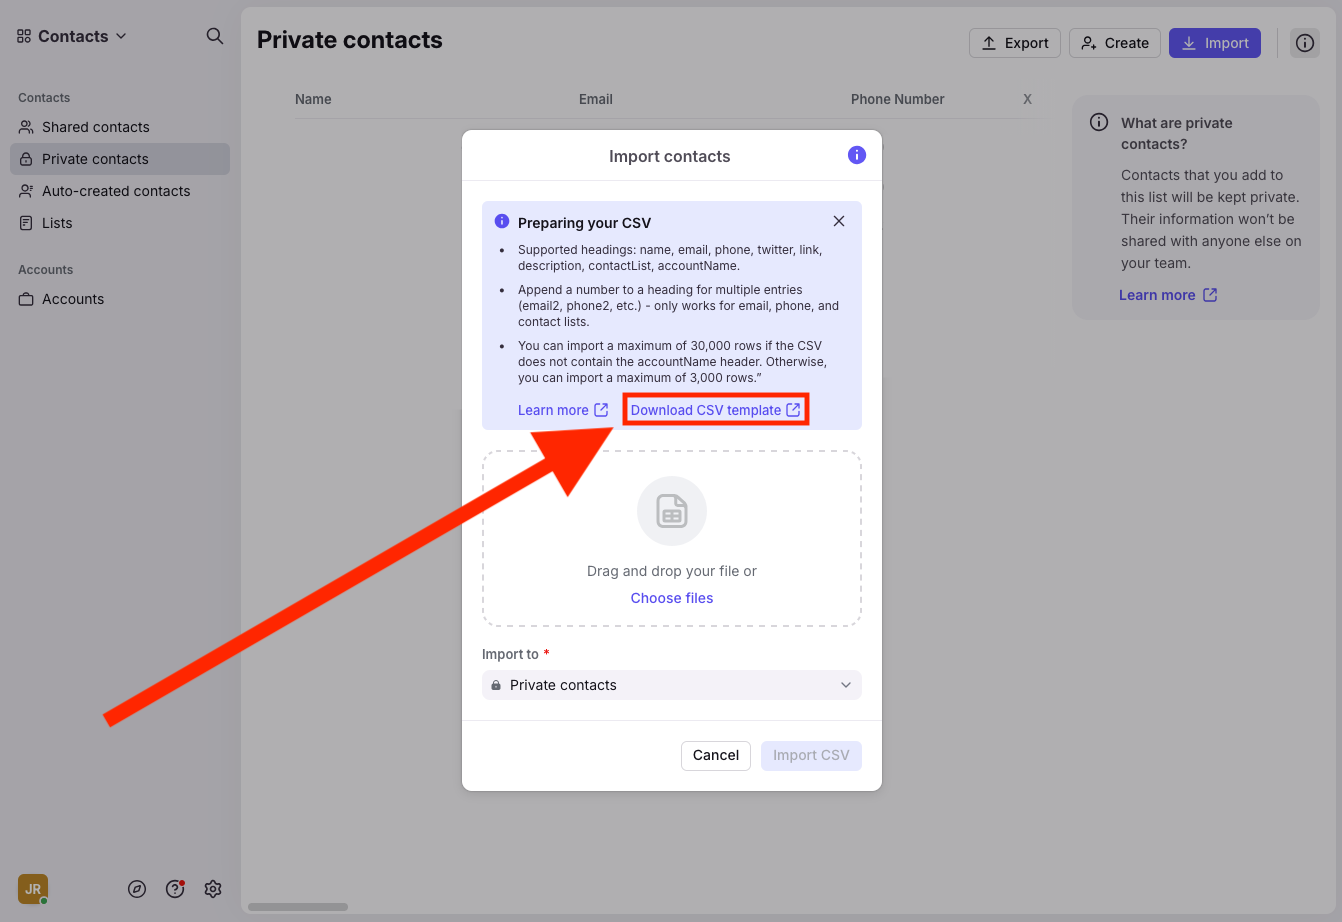
Step 2: Upload your contact list
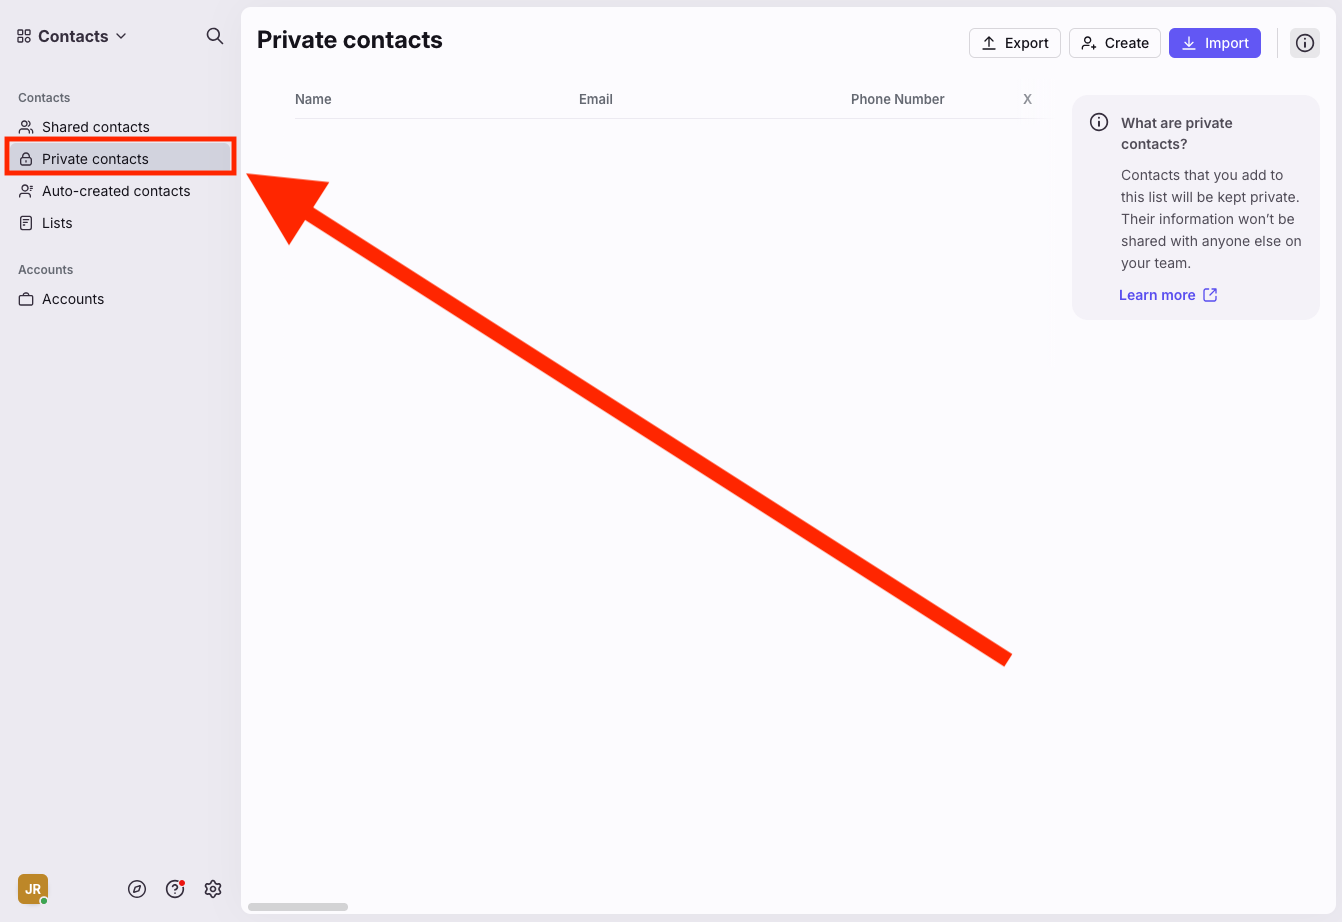
Click the Contacts tab in your personal workspace.

Choose Private Contacts.
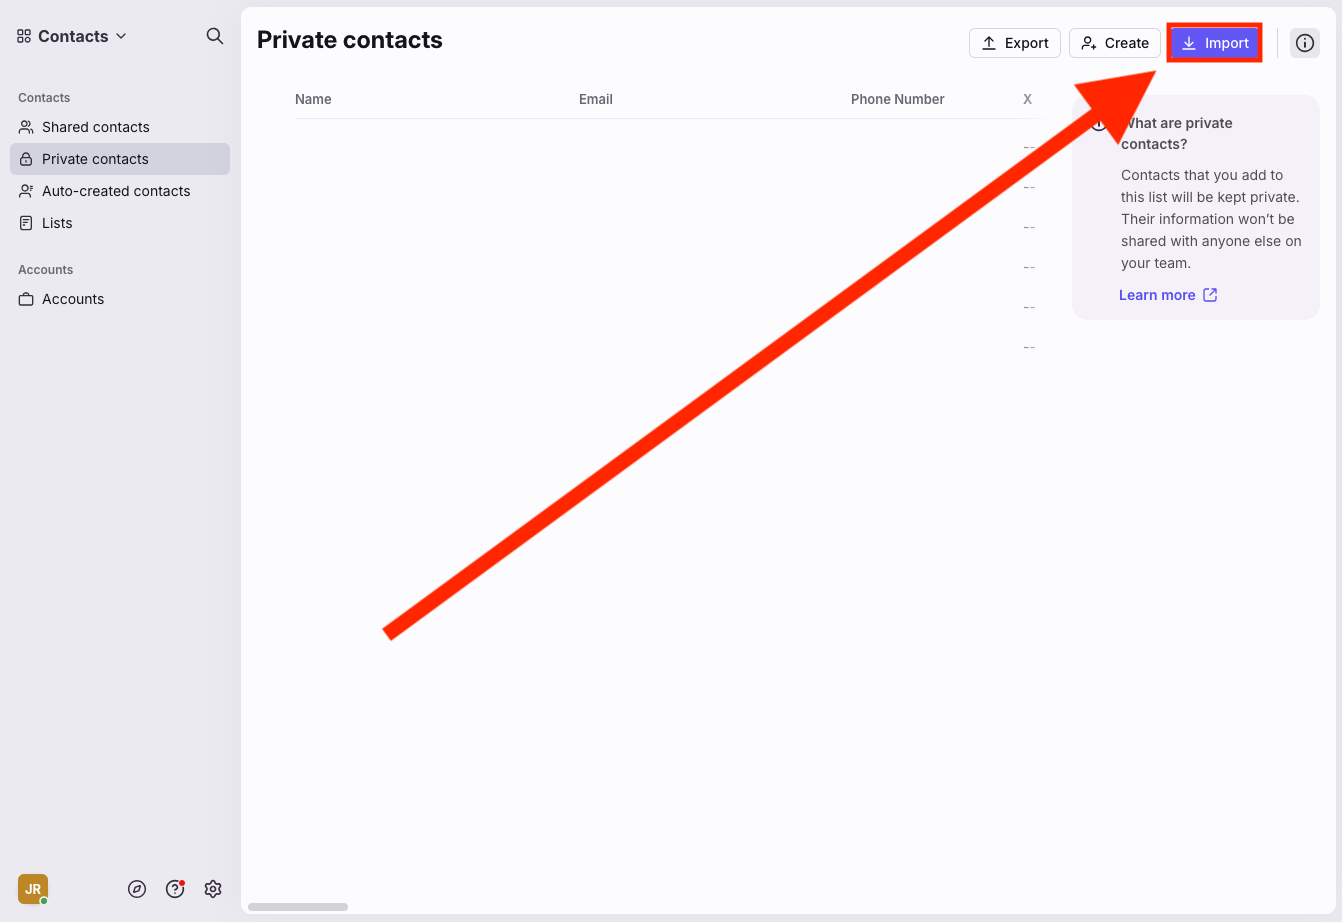
Click the Import button.
Choose your contact file (must be .CSV). The template can be downloaded directly from this pop-up. The uploaded document must follow this template layout.
Click Import CSV.
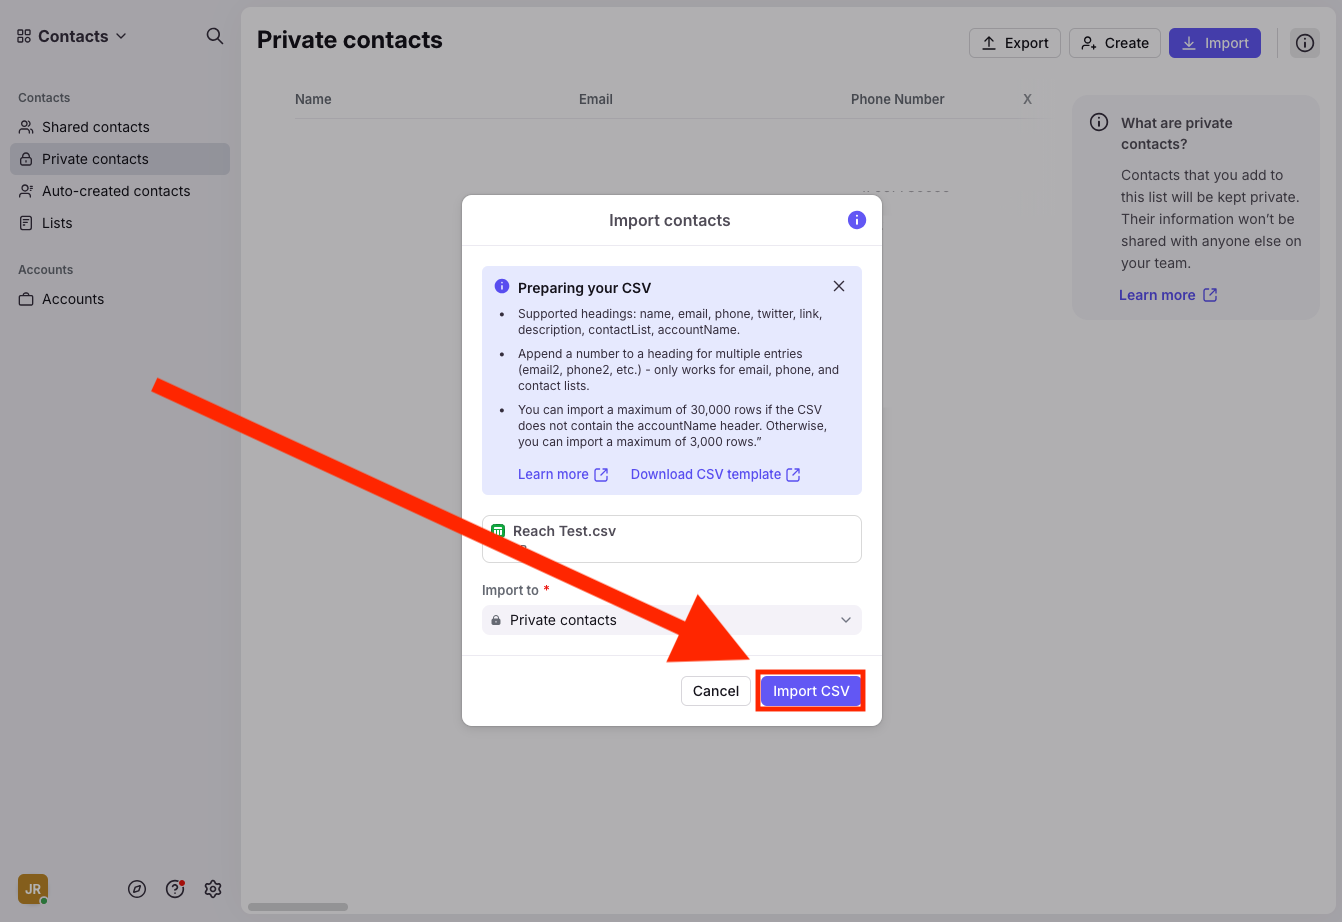
Once uploaded, click into the list to verify accuracy.

💡 Tip: Ensure your contact file is properly formatted (e.g., phone numbers in E.164 format) before upload to reduce import errors.
For more information on Contact List formatting and to download the contact list template, please view the following article: https://help.gocarecx.com/en/articles/3126144
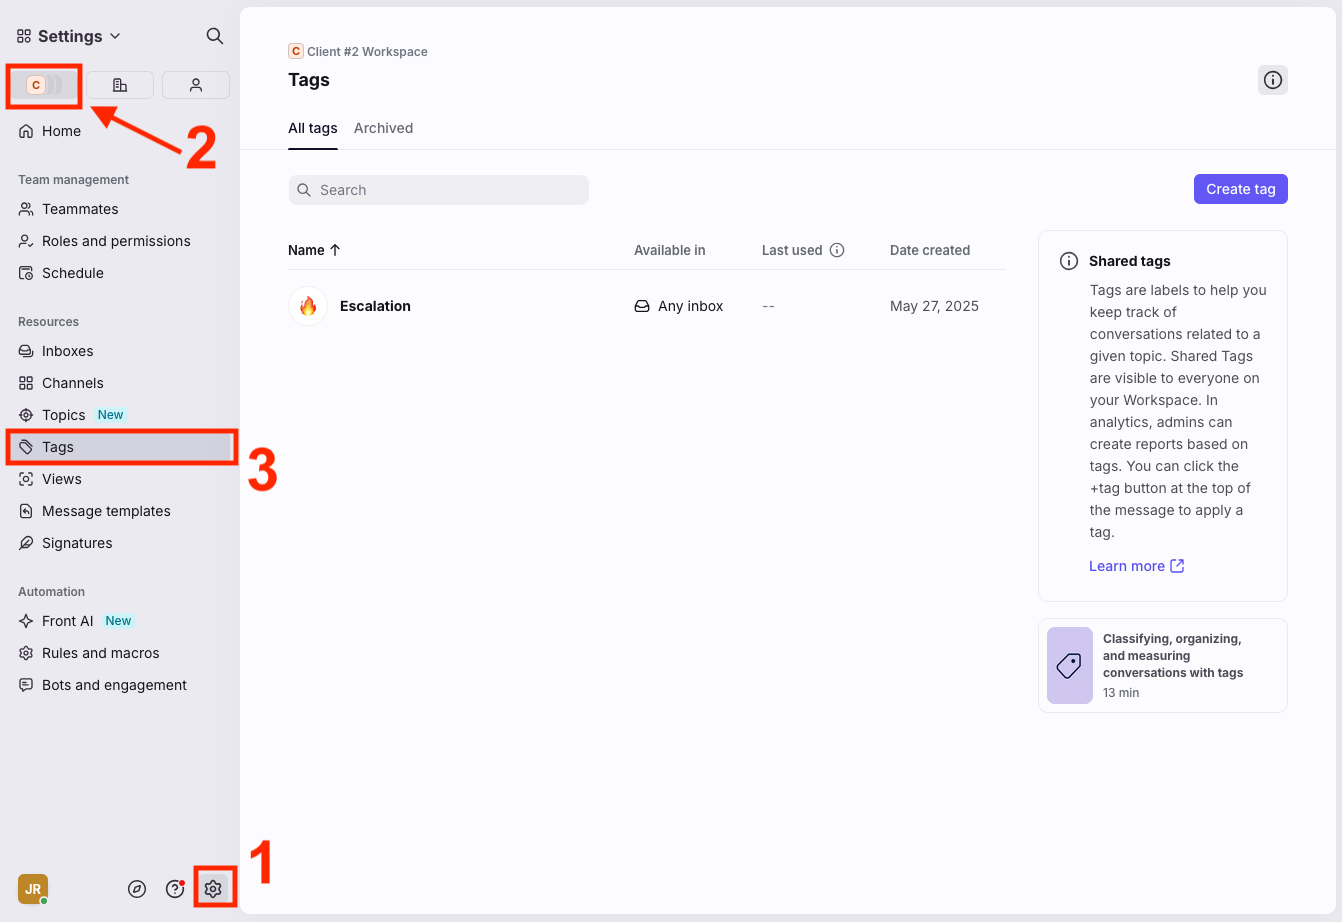
Step 3: Tag your campaign
Tagging helps with campaign tracking and reporting.
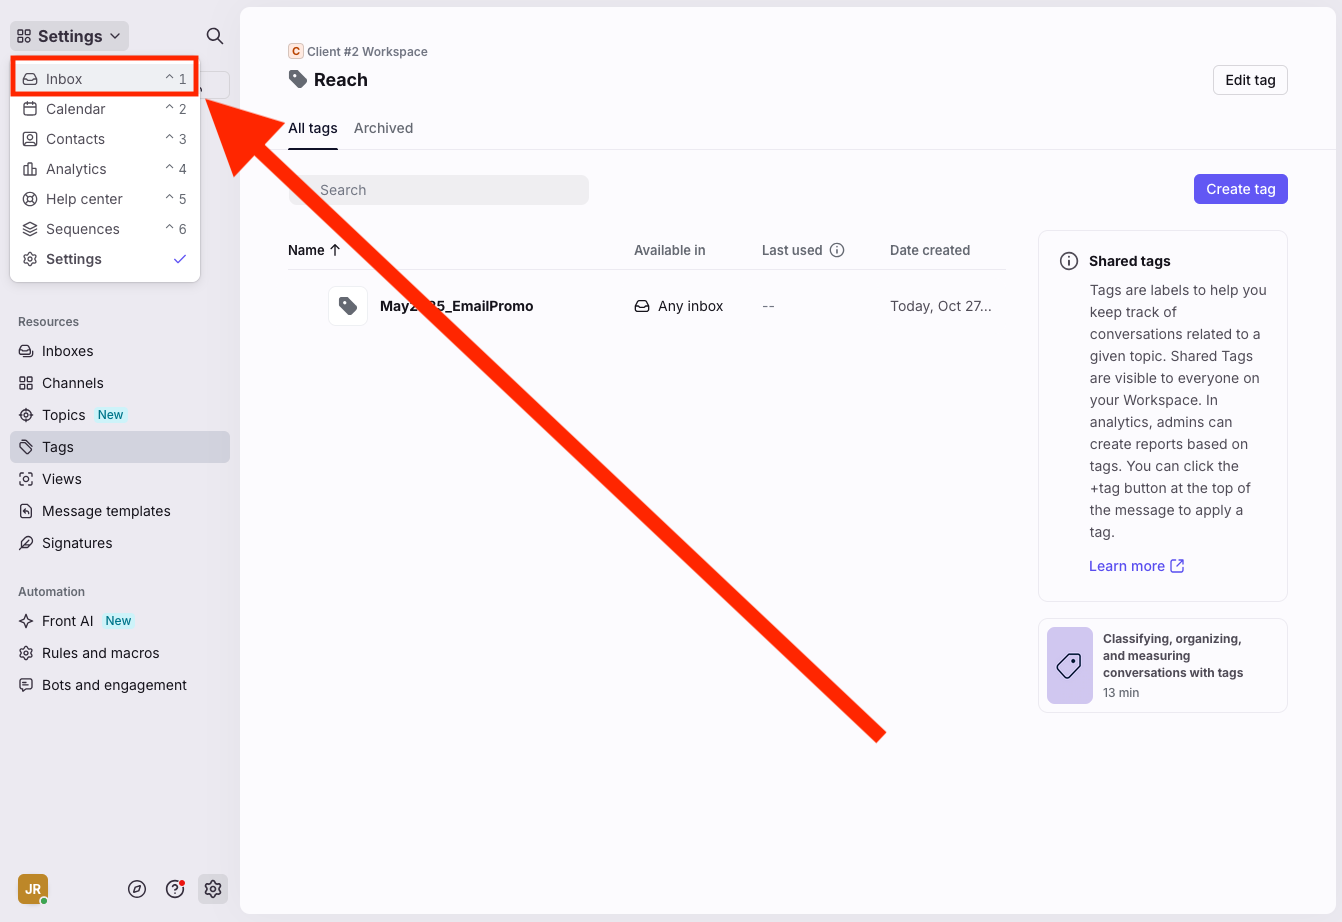
From the Settings gear, click Tags under your Workspace's sidebar.
Click Create tag
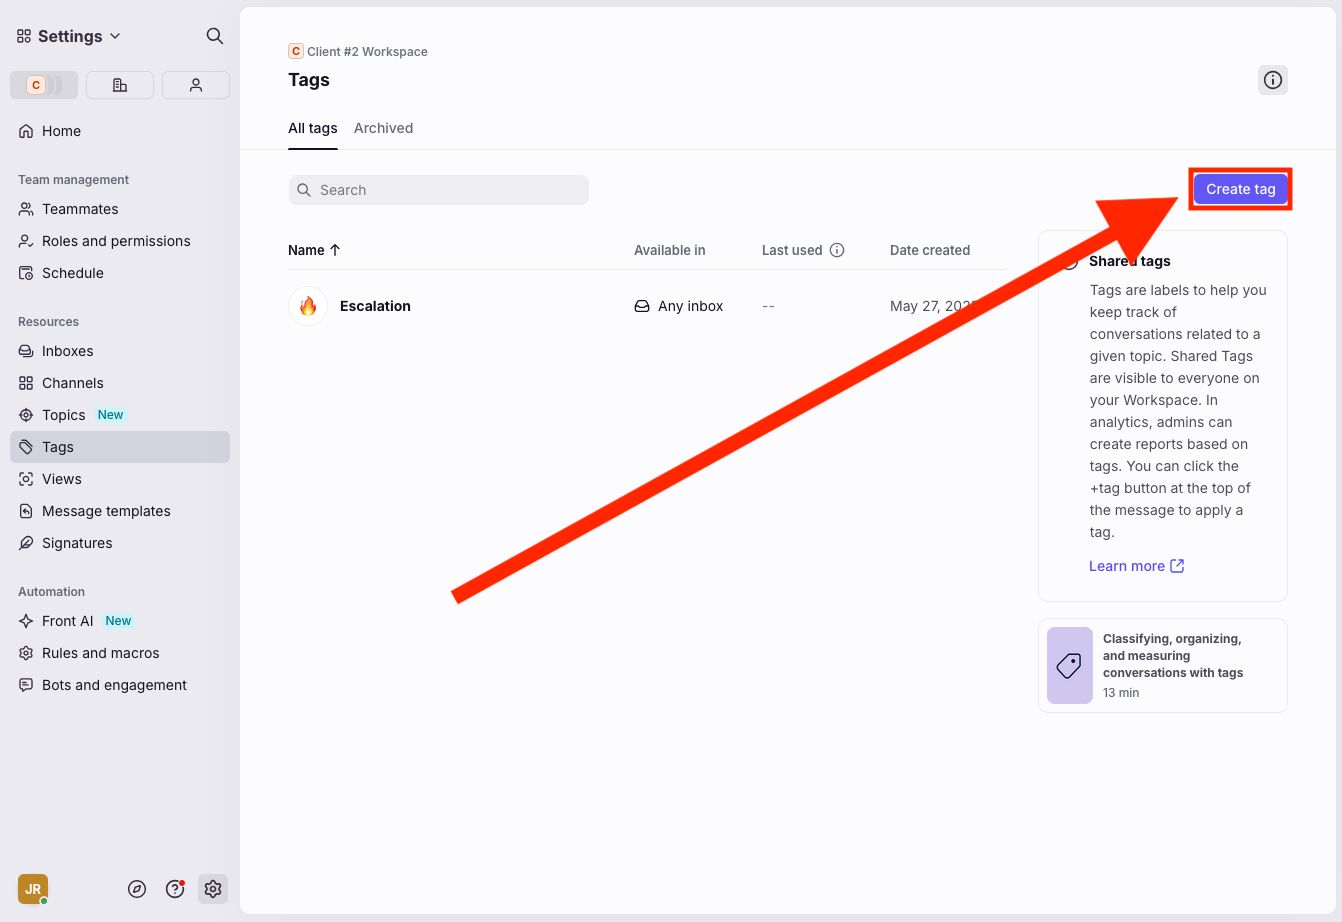
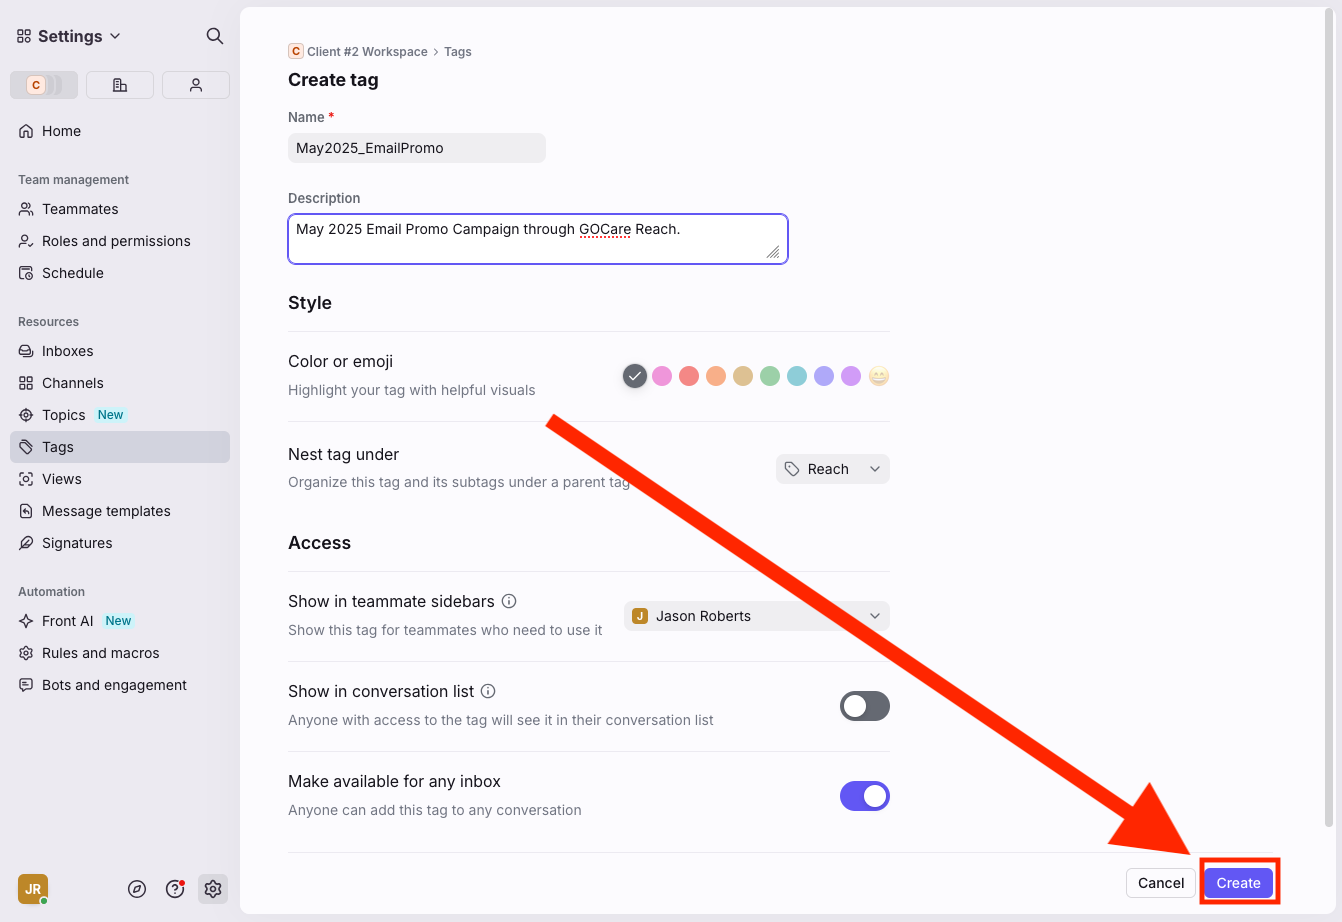
Enter a unique name (e.g. May2025_EmailPromo).
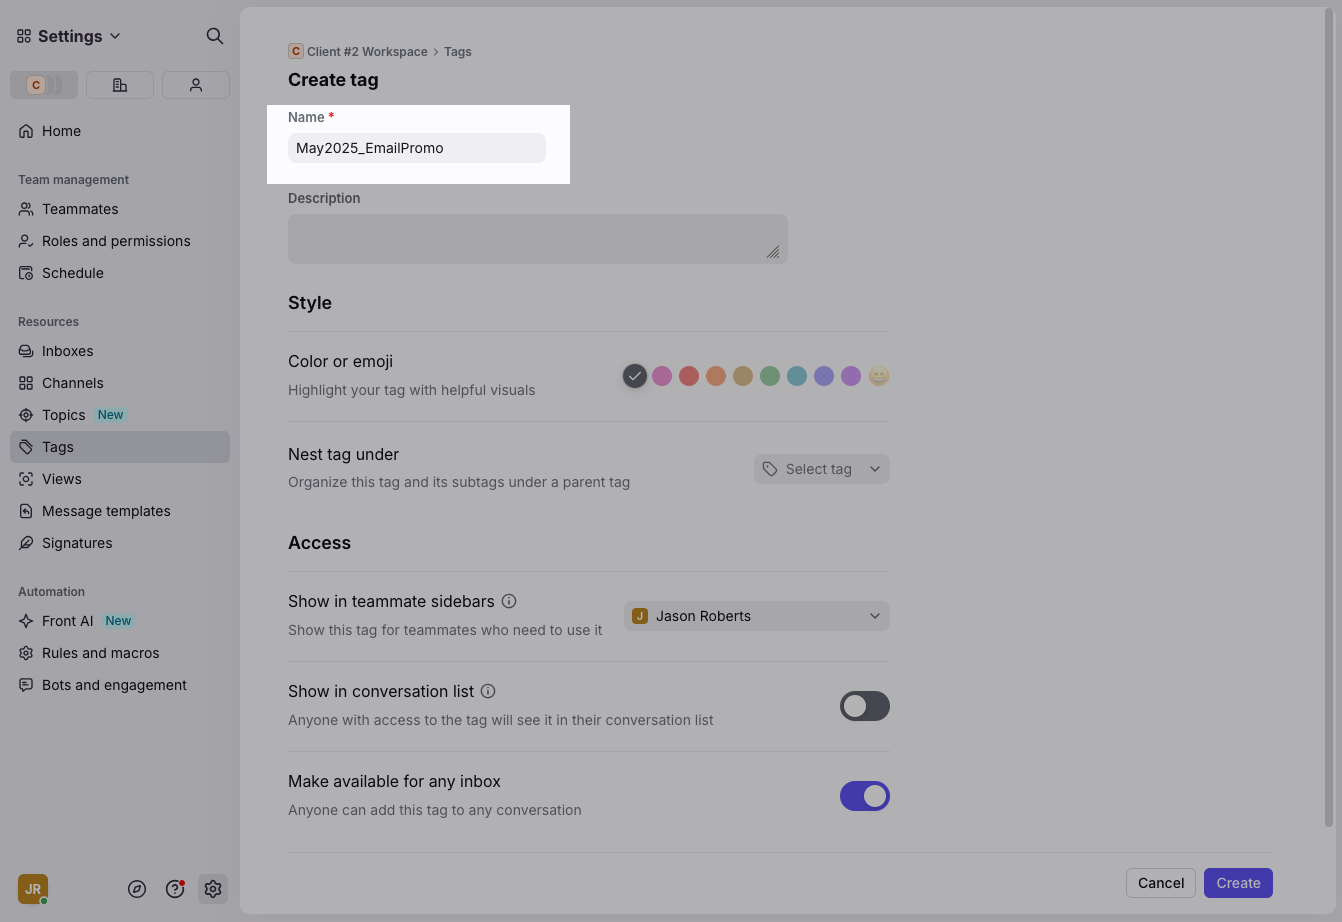
(Recommended) Nest your new tag under an existing GOCare Reach parent tag for better organization.

Click Create.
Step 4: Launch the campaign
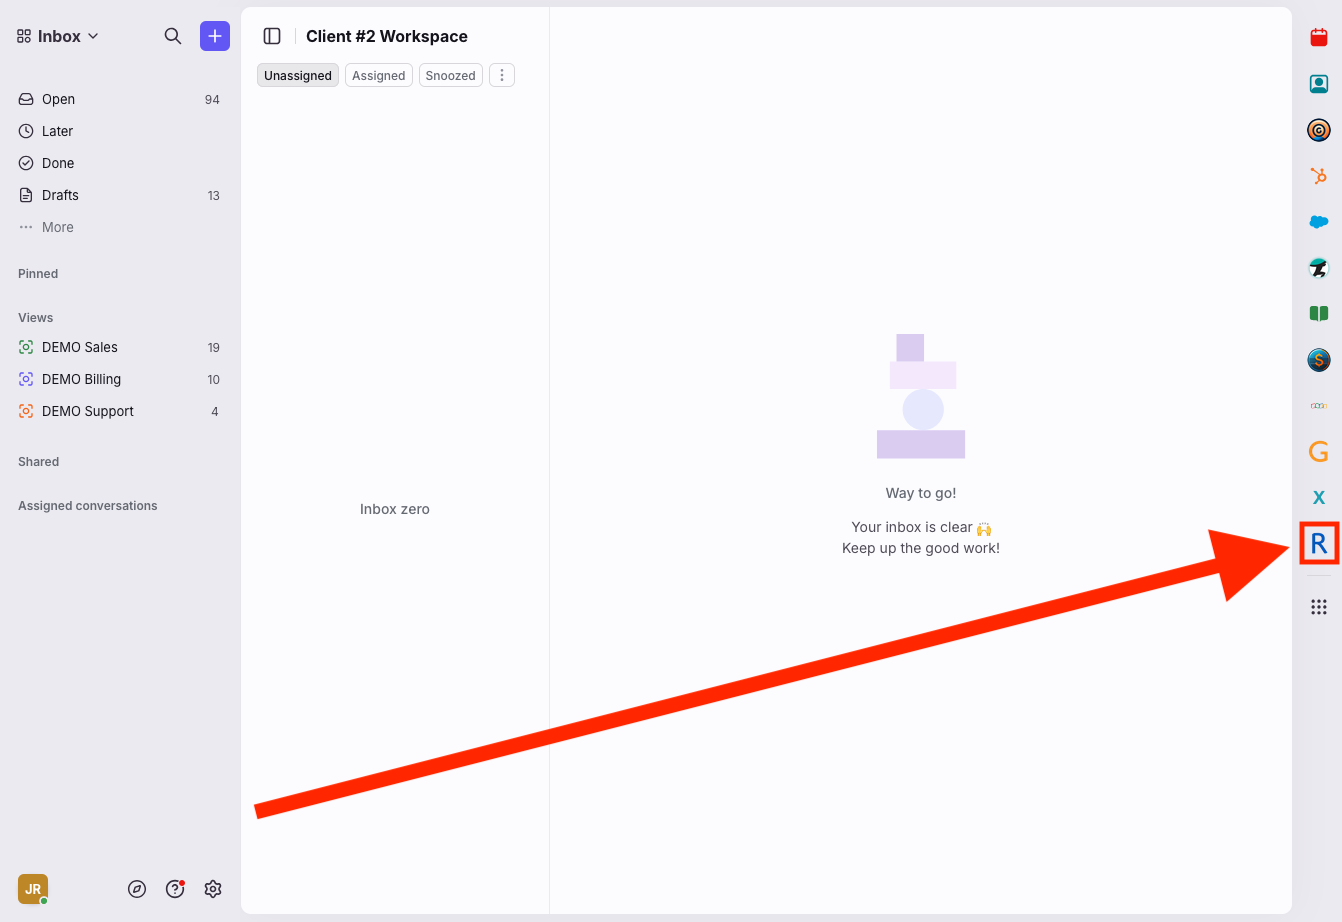
Click the Inbox icon to return to the main screen.
Open the GOCare Reach plugin from the sidebar.
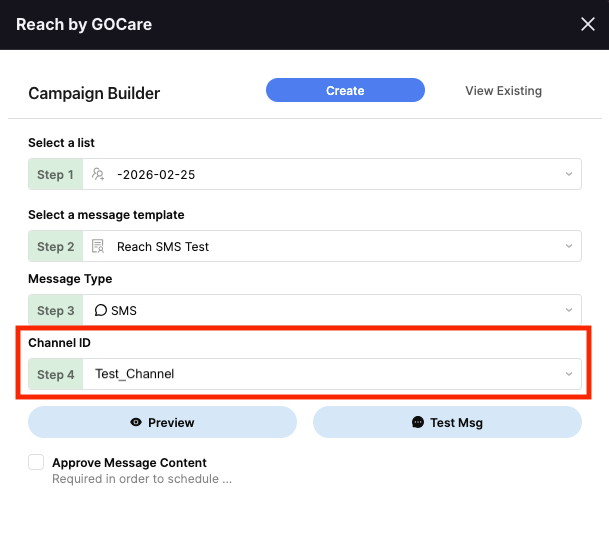
Under Select a List, choose the contact list you uploaded.

Under Select a Message Template, pick the one you just created.
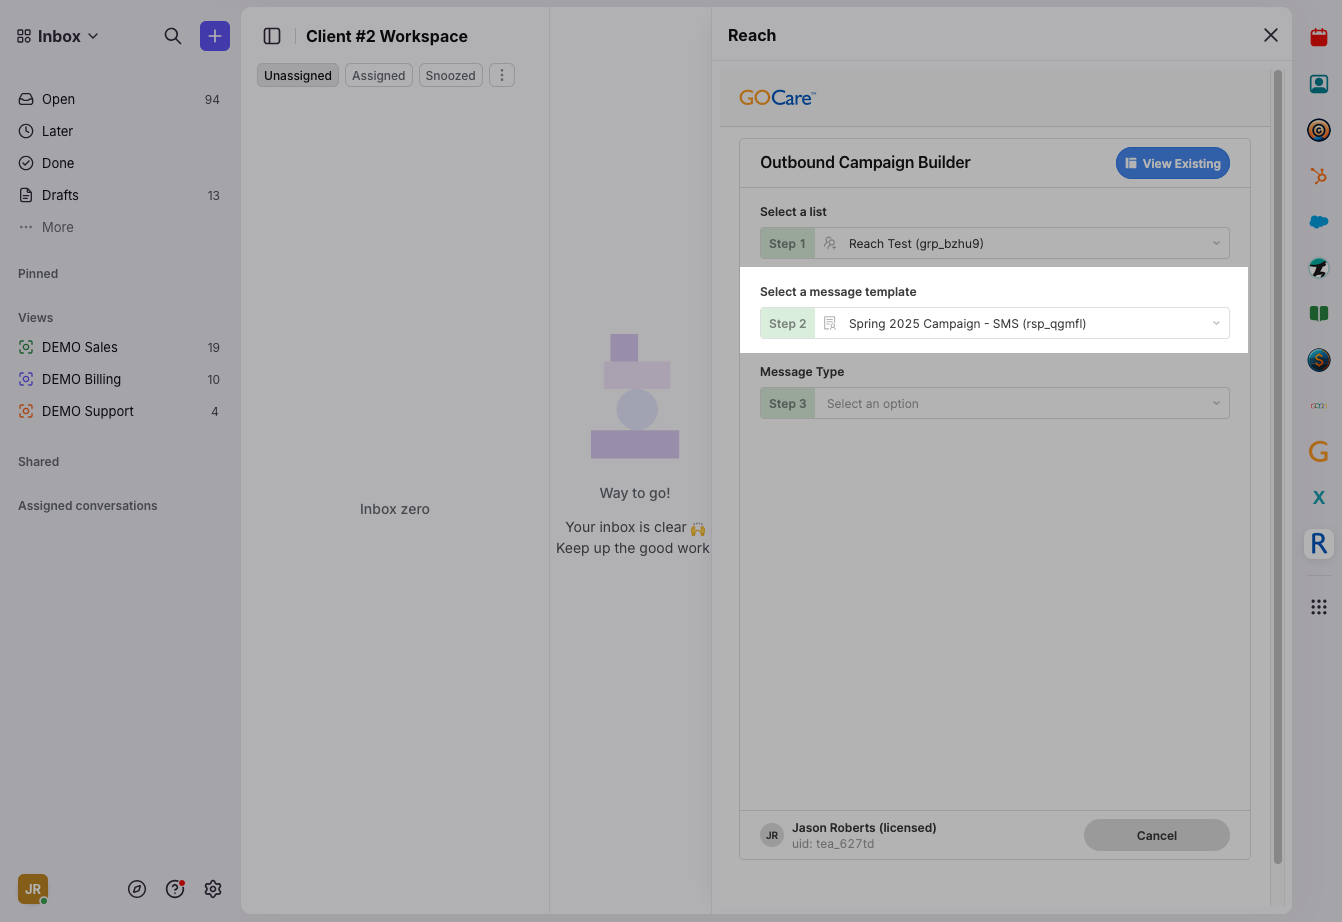
Choose the Message Type (SMS or Email).
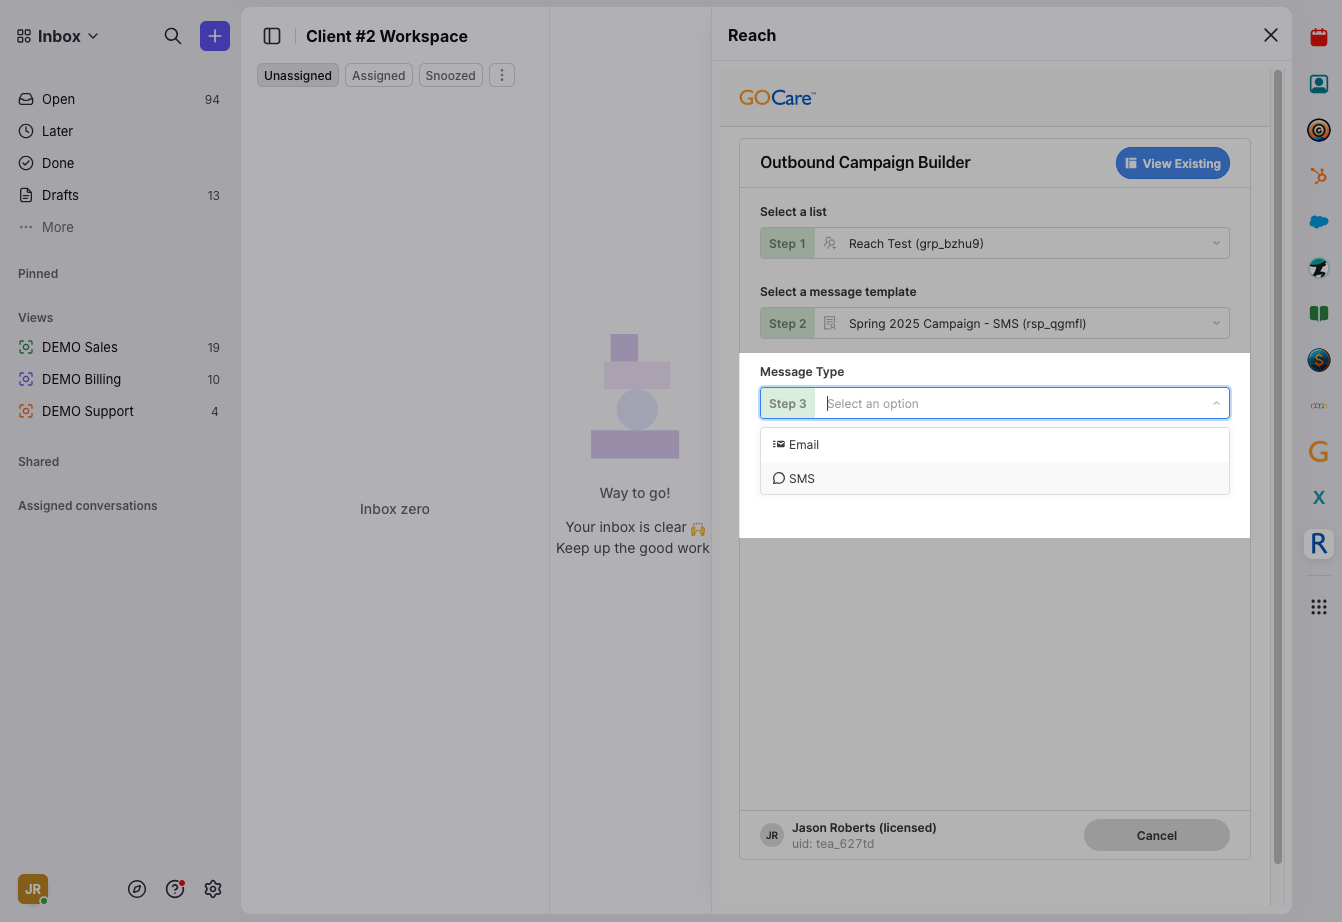
Select the Channel ID. Note: This option is only available for SMS.
This dropdown identifies the sending channel used for the campaign. Most organizations will only have a single option available. If multiple channels exist, select the appropriate one for your campaign.
Click Preview to review the message. Note: This option is only available for SMS.
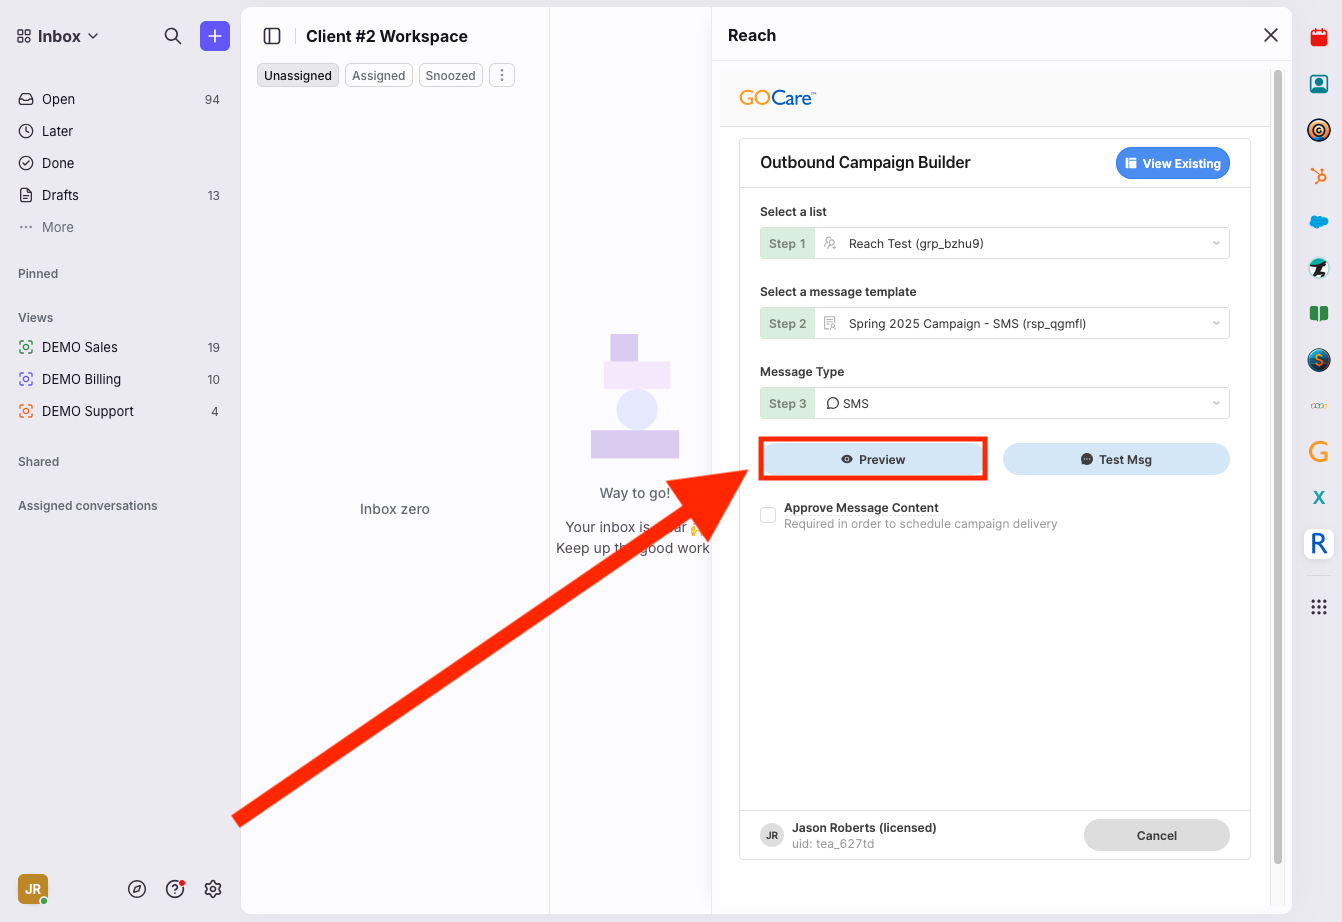
Send yourself a test message using the Test Msg button.
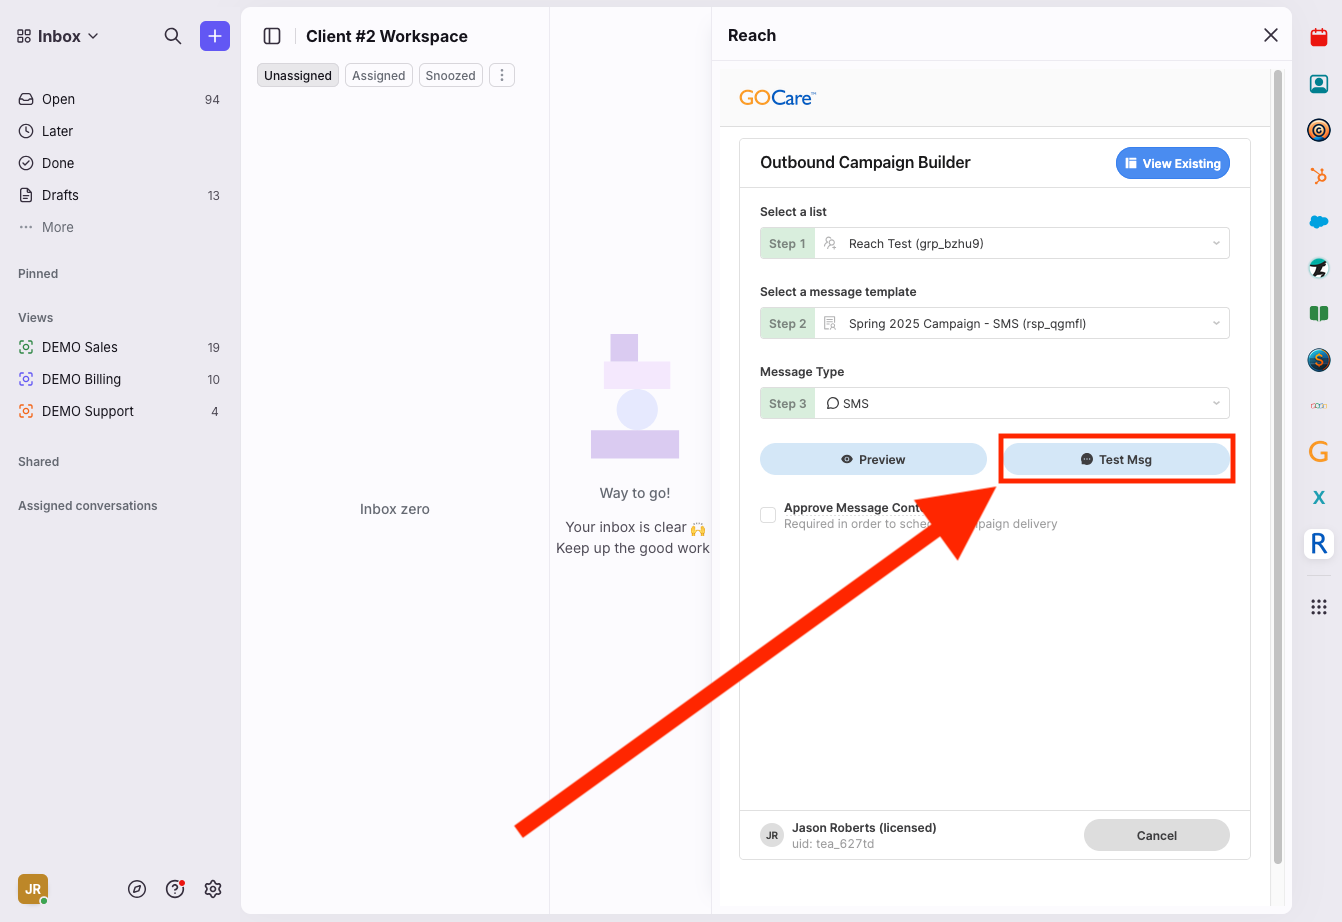
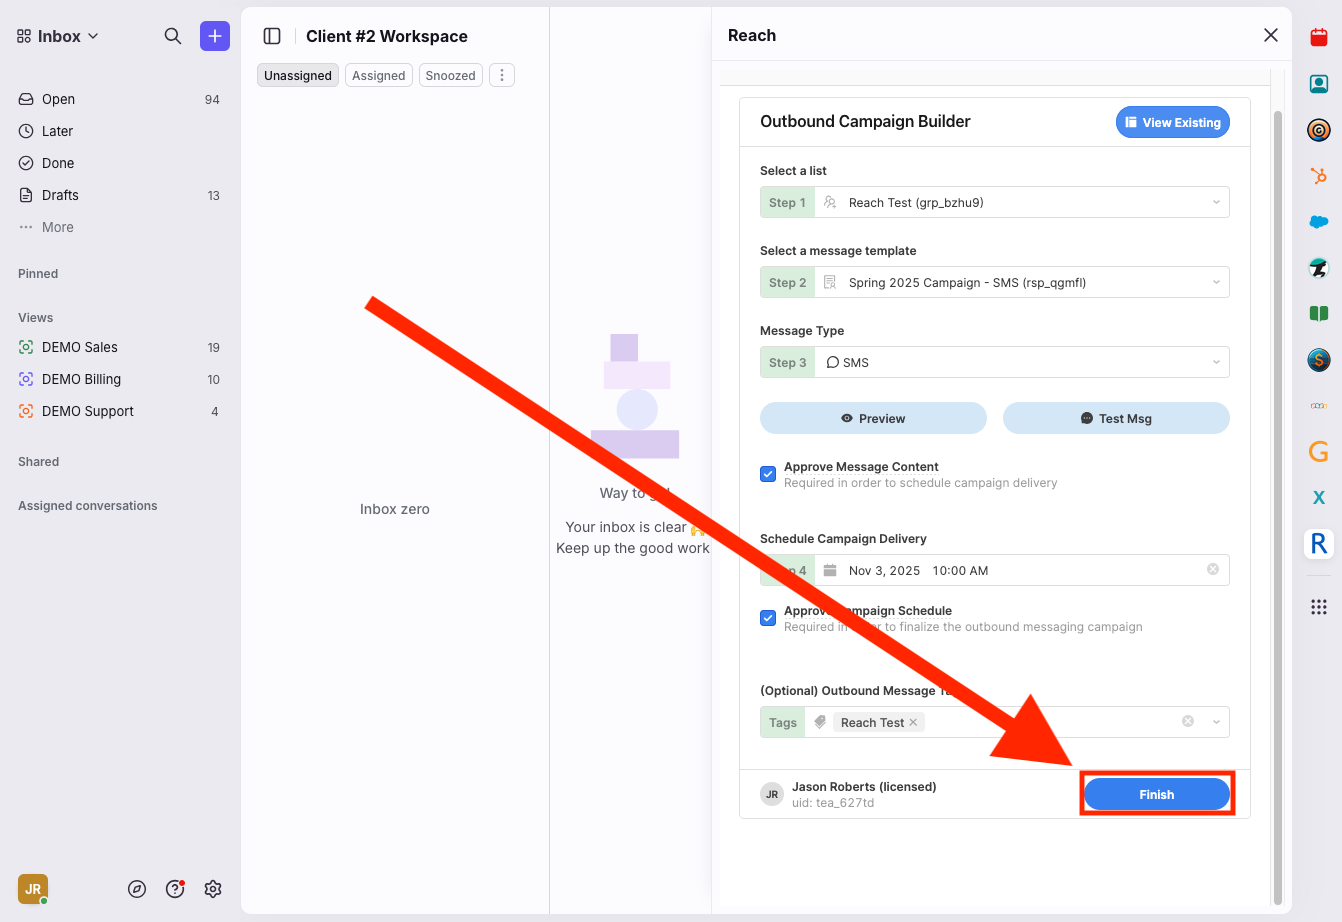
If the test is successful, click to Approve Message Content.
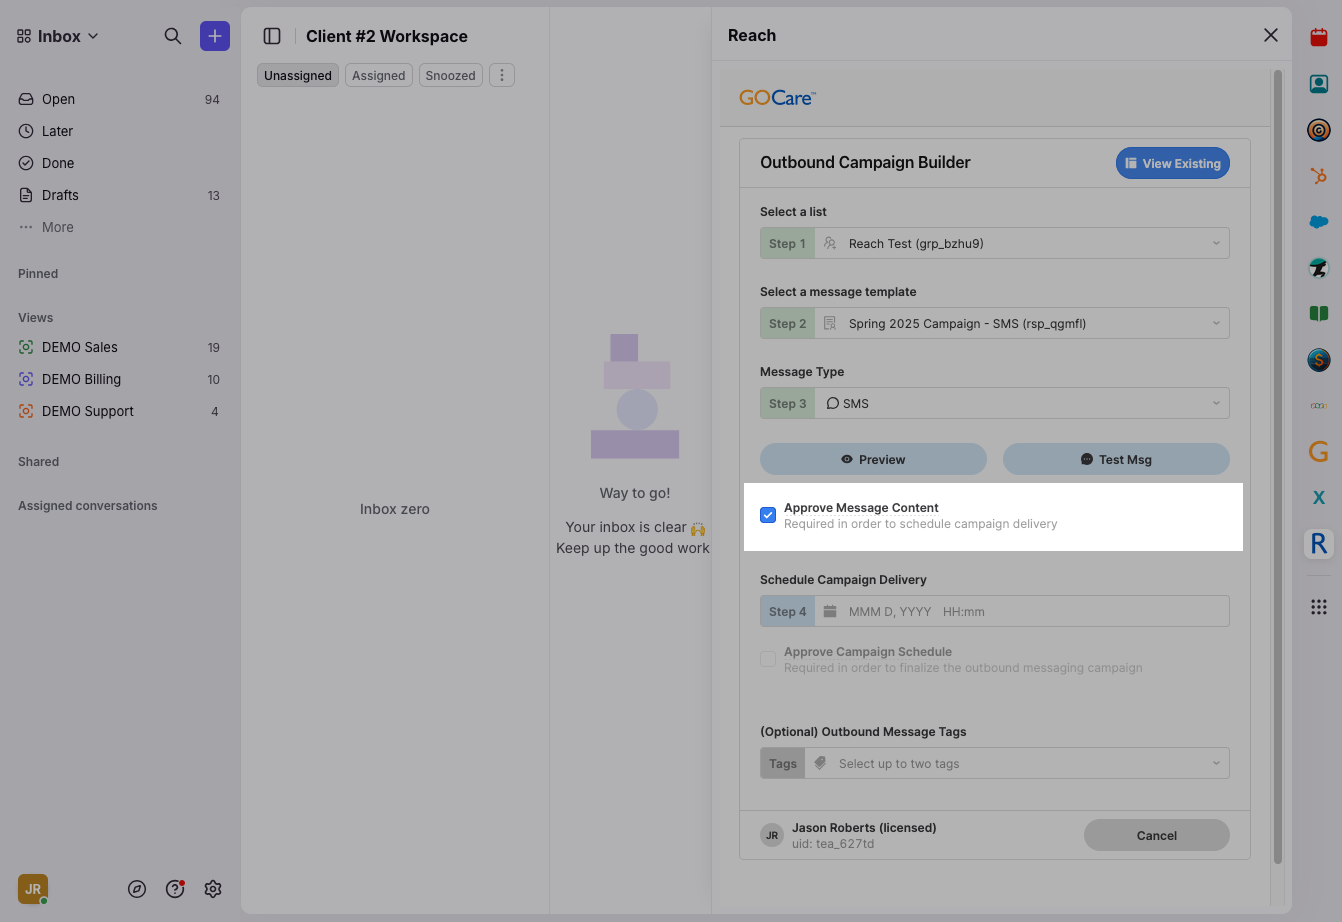
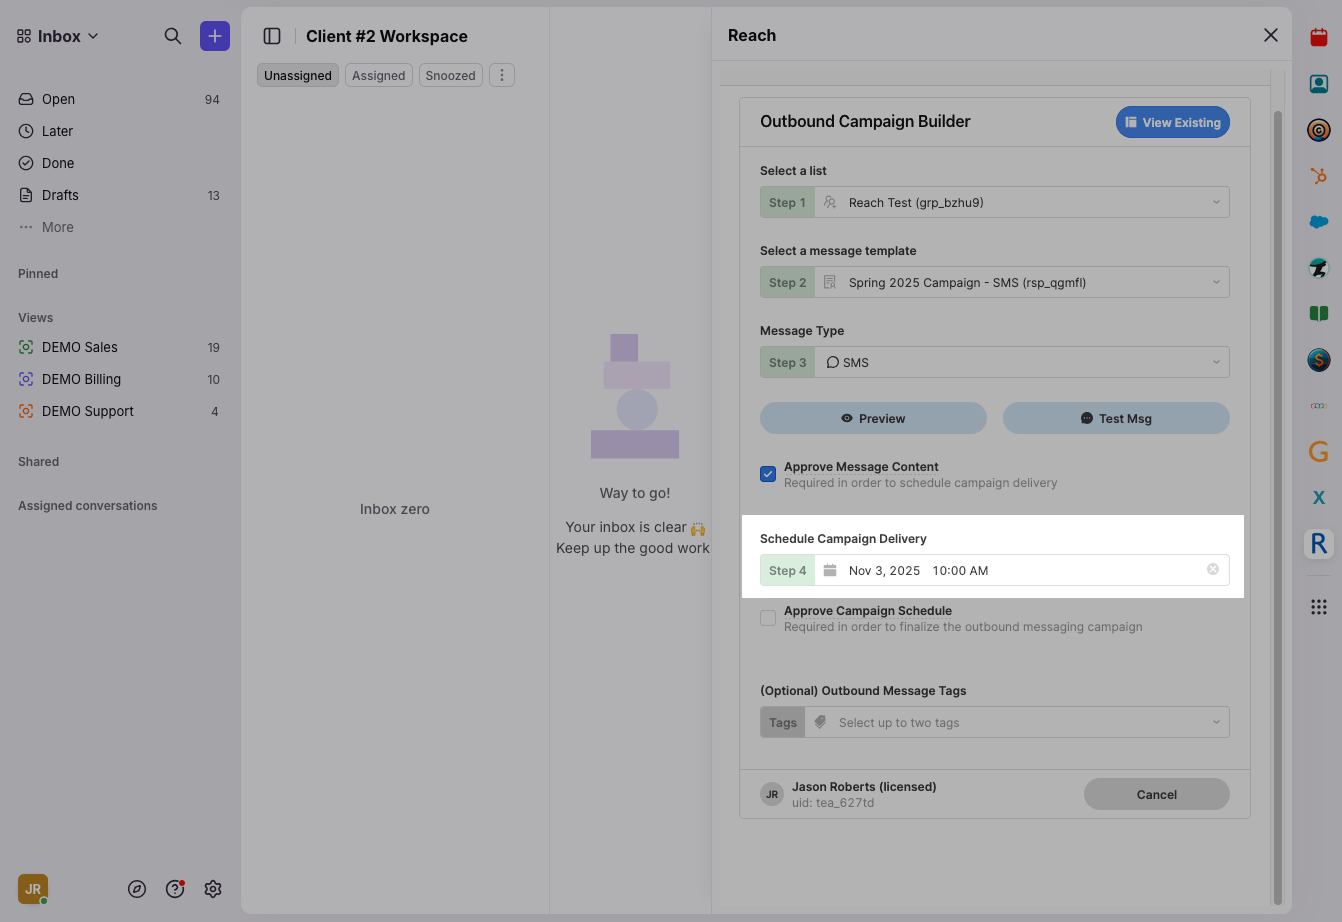
Select your desired Date and Time (must use one of the provided 15-minute intervals).
⚠️ Warning: If the set time is outside of a 15 minute increment, the message will not deliver.
Click to Approve Campaign Schedule.
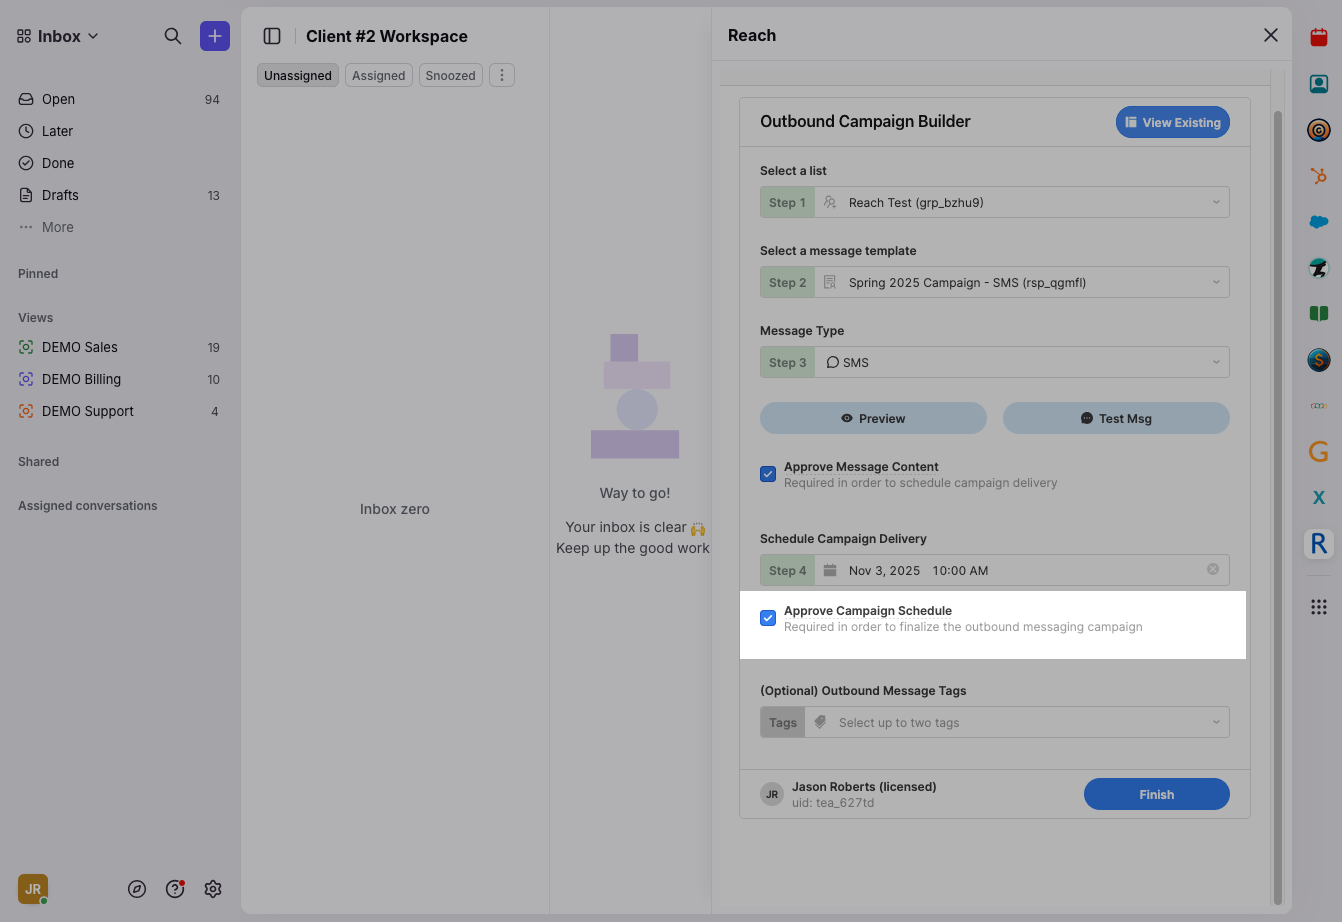
Under Outbound Message Tags, apply your campaign-specific tag.

Click Finish to finalize the campaign.
To monitor or cancel upcoming campaigns, click View Existing. Note: Once a campaign is scheduled, it cannot be canceled.
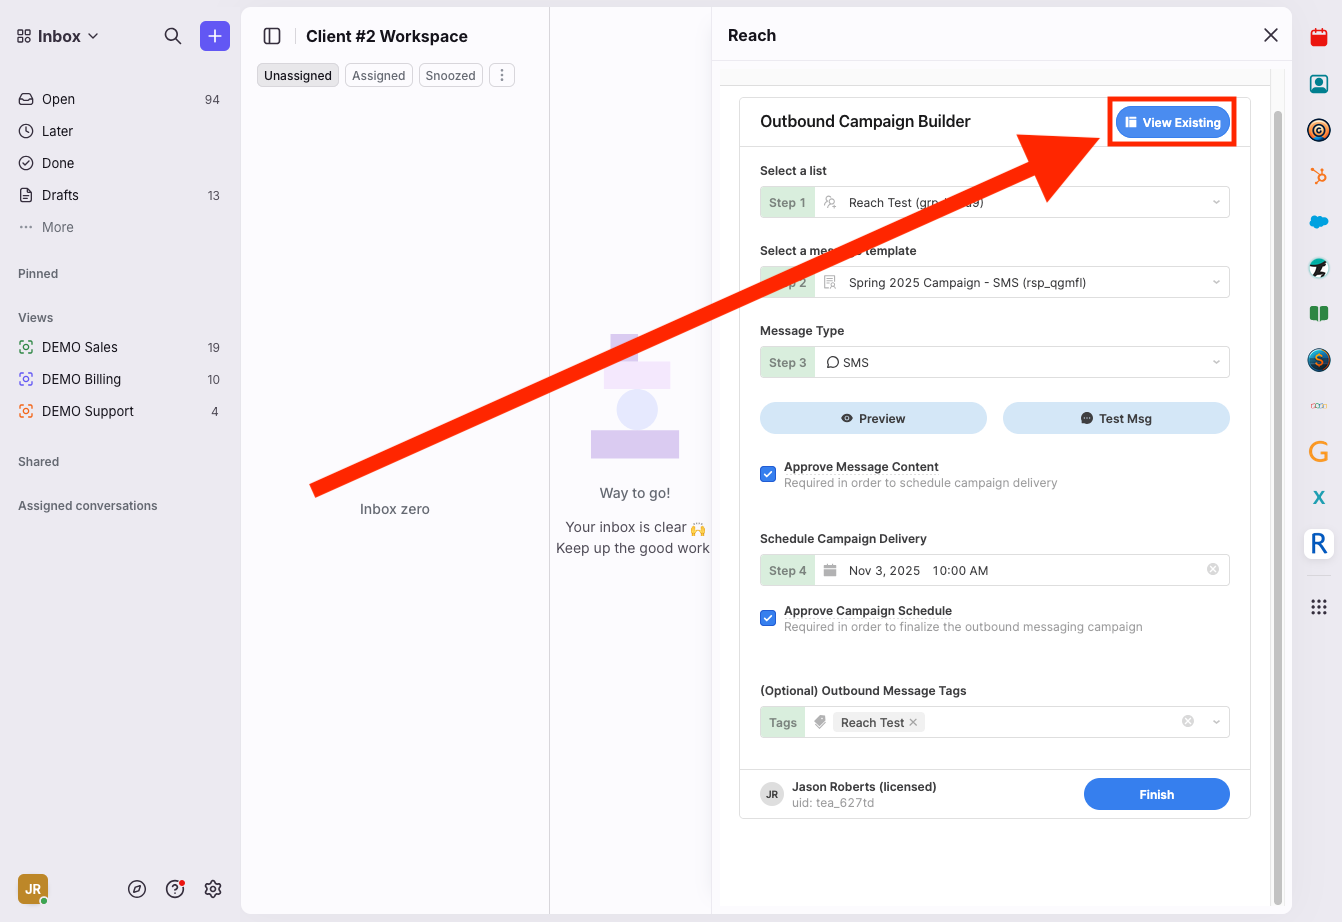
⚠️ Warning: Campaigns cannot be edited or canceled after scheduling. Always test first.
Step 5: Set up response automation (optional)
To streamline how replies are handled and tagged:
Add an auto-response message
Navigate to Settings → Message Templates In your Workspace.
Click Create Template.
Name it clearly (e.g., 2025 Spring Campaign Auto-Reply).
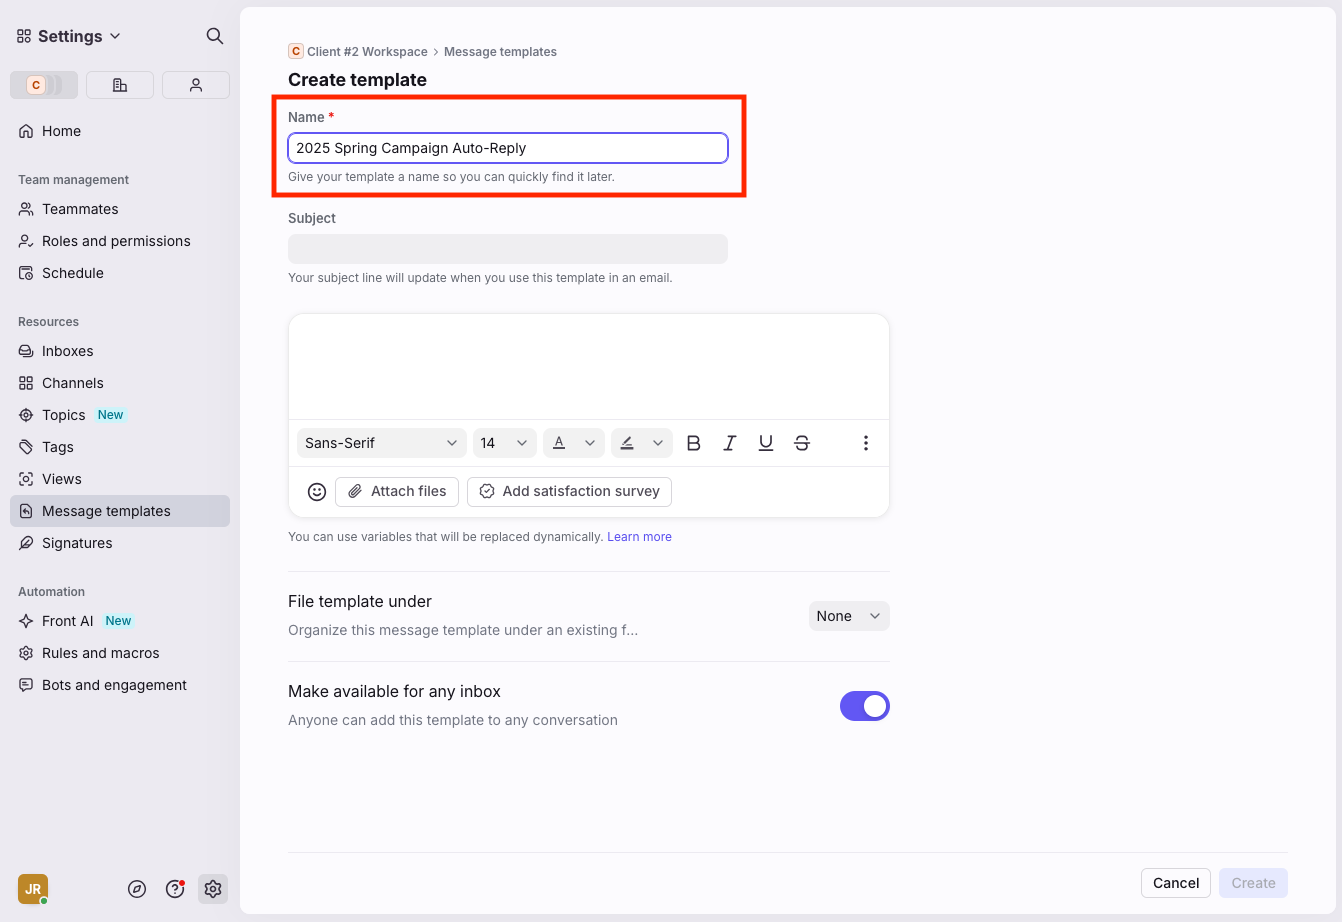
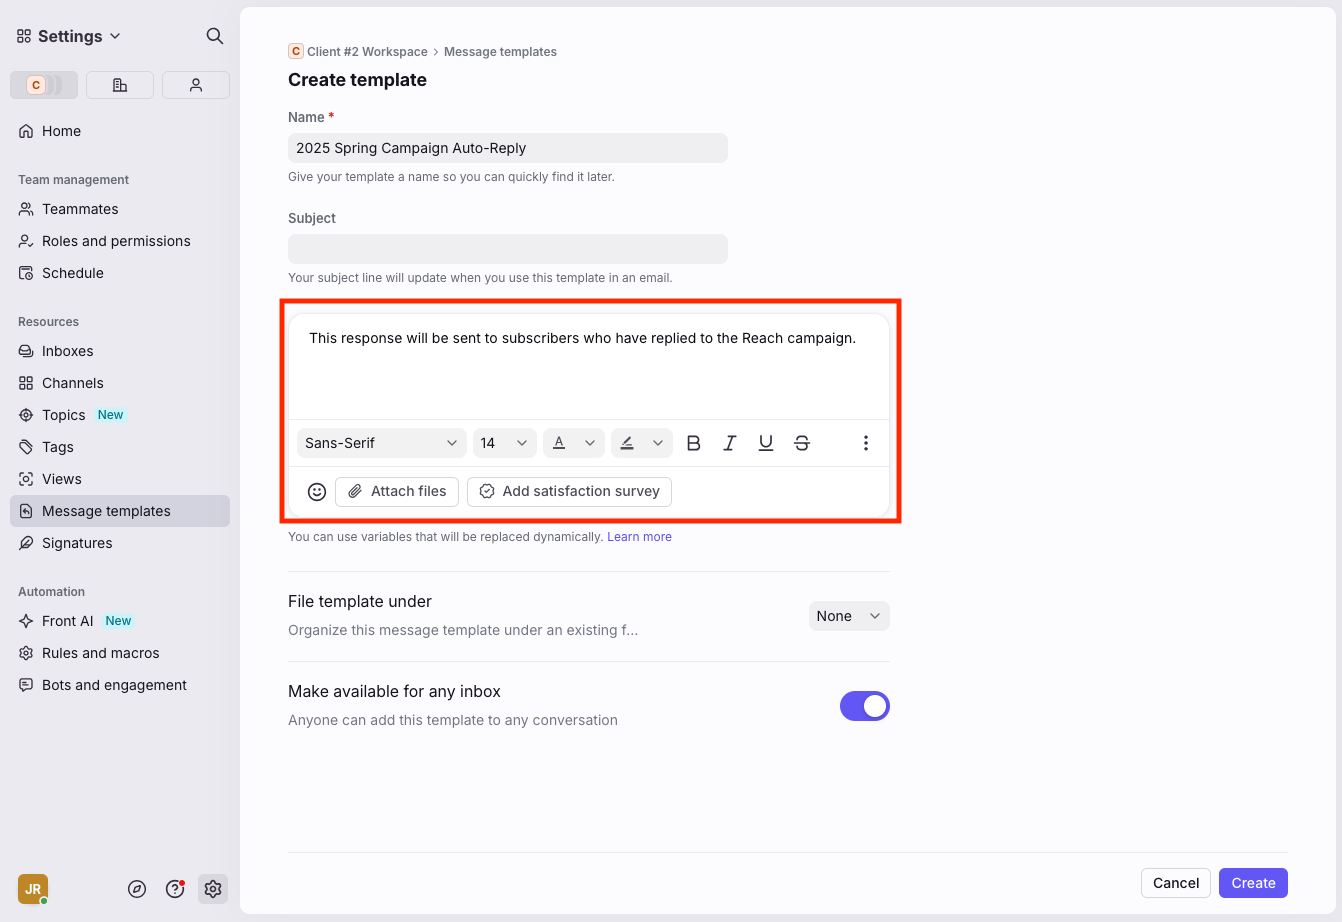
Write your auto-response message in the body. Note: Email campaigns allow for text formatting and file attachments; SMS campaigns do not.
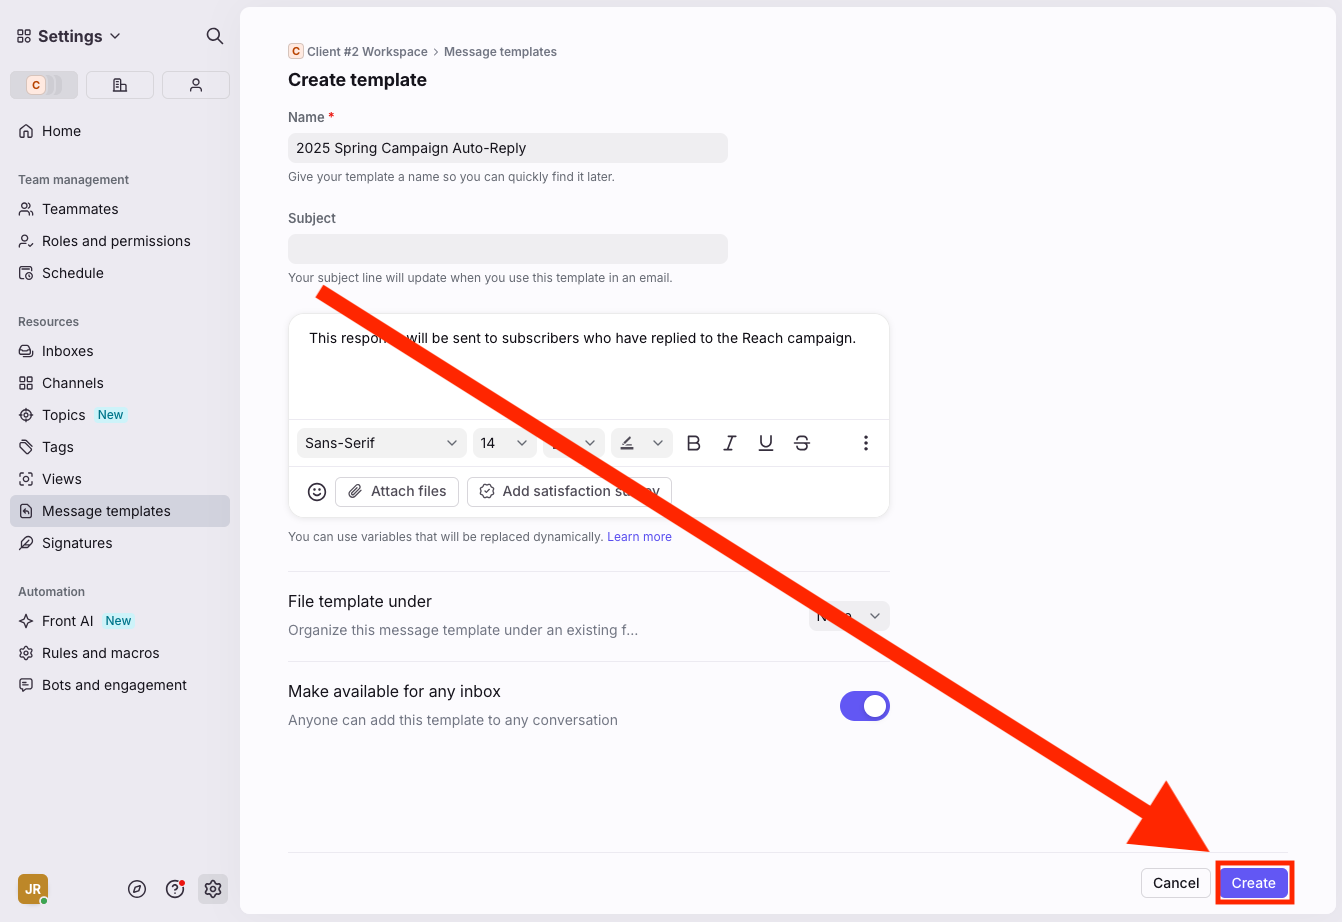
Click Create.
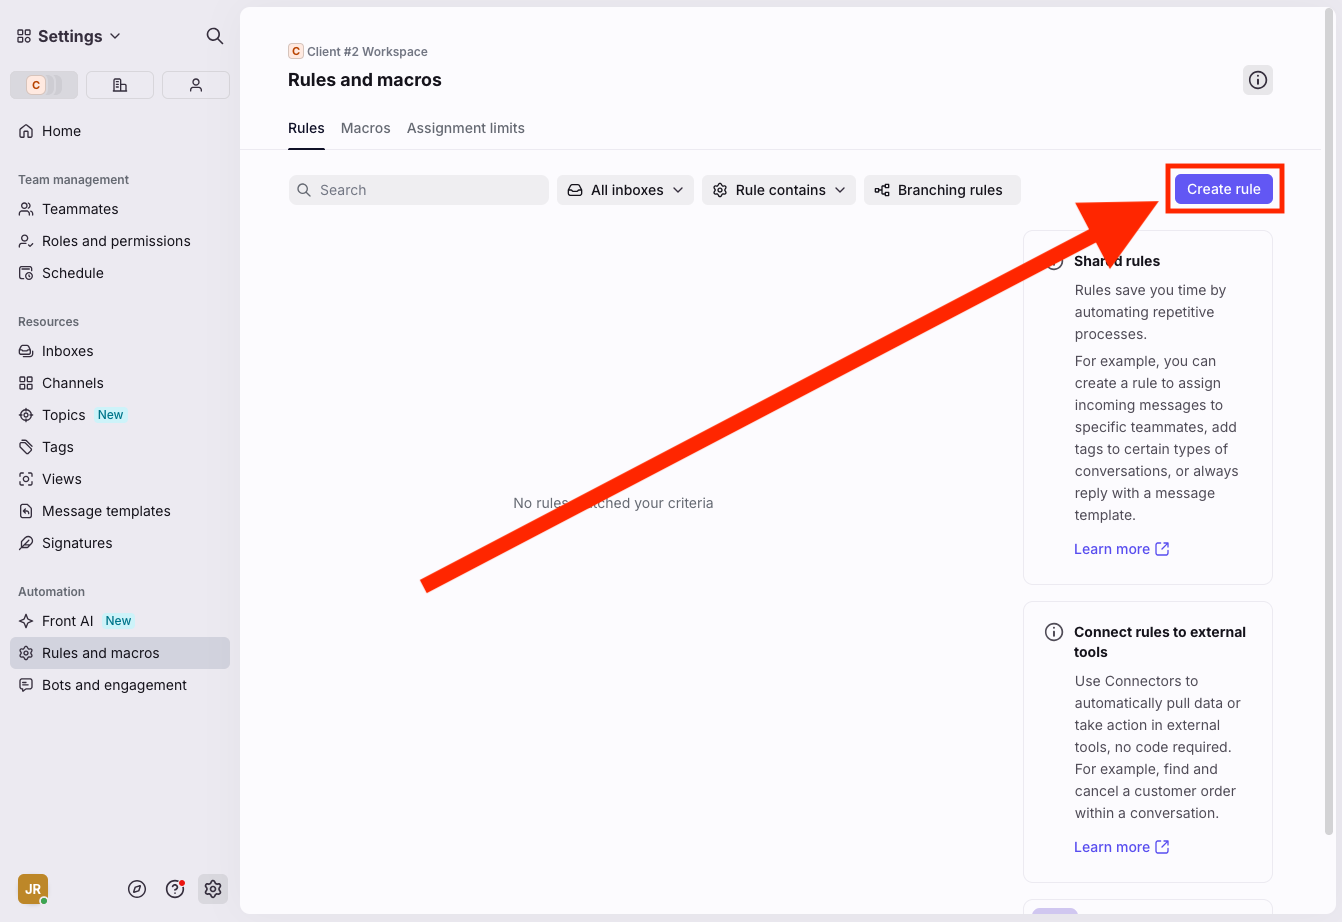
Create auto-response rule
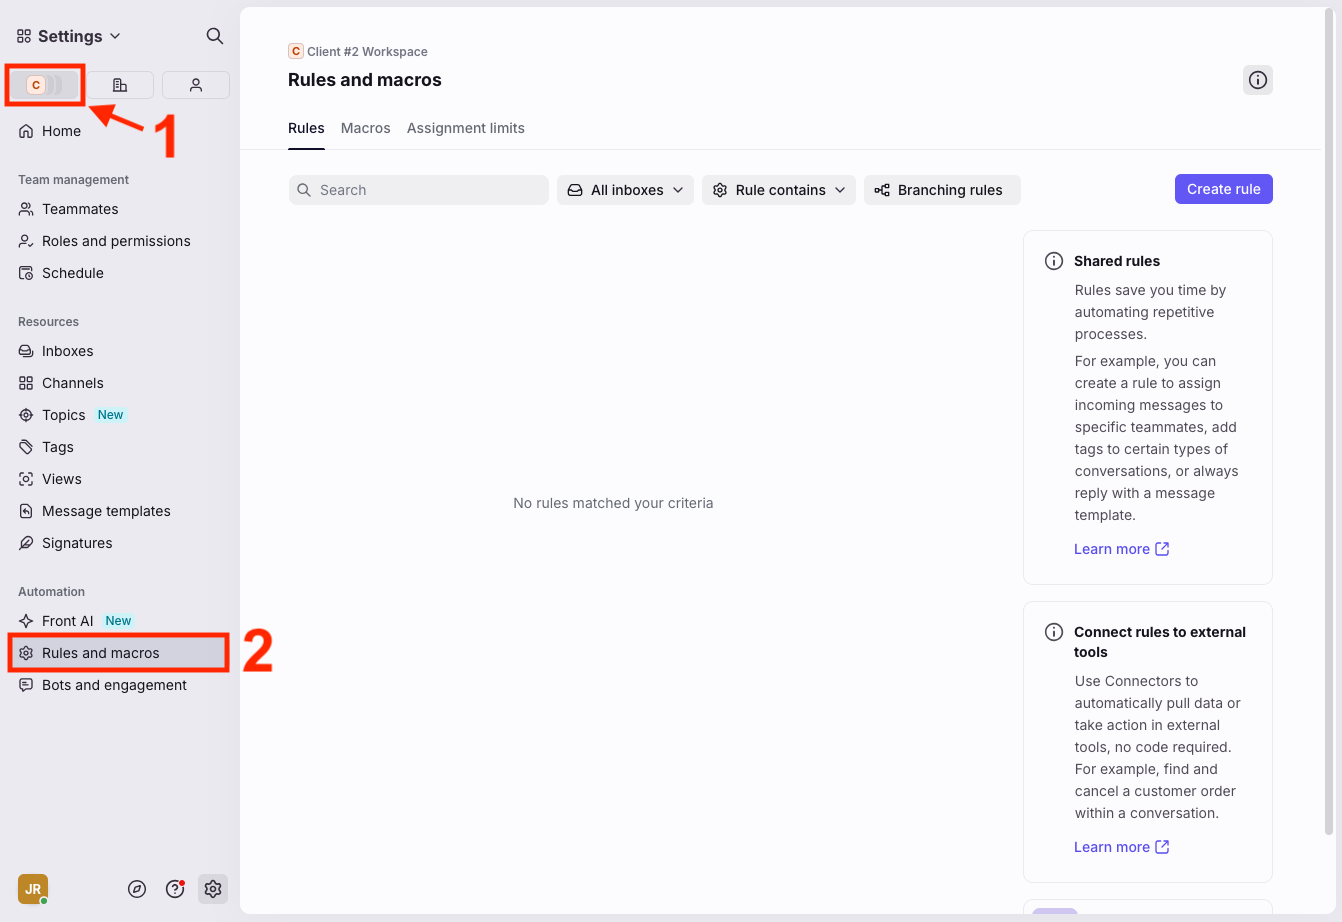
Go to Settings → Rules & Macros in your Workspace.
Click Create Rule.
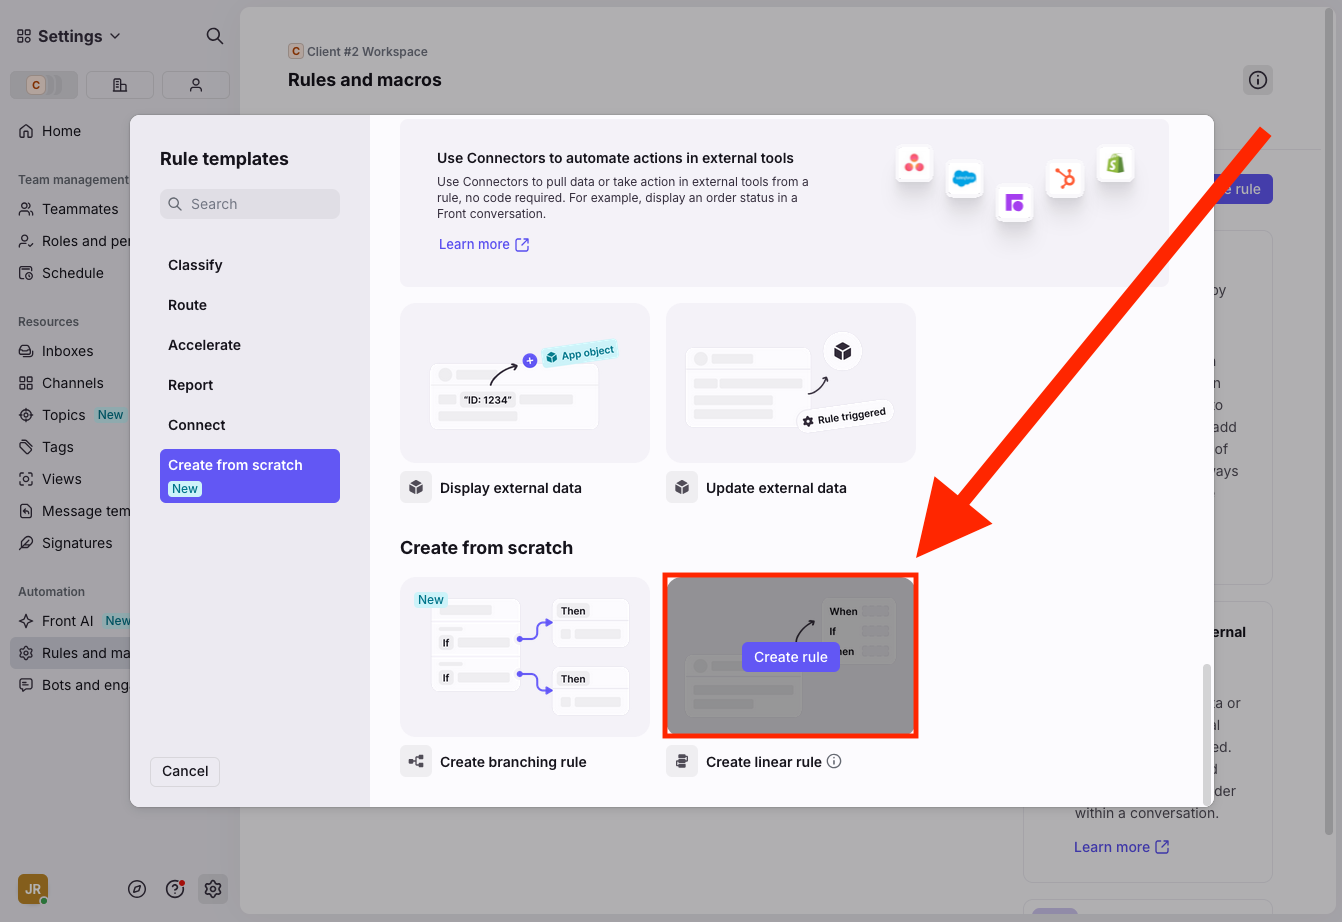
Within the pop-up menu, select Create linear rule from Scratch.
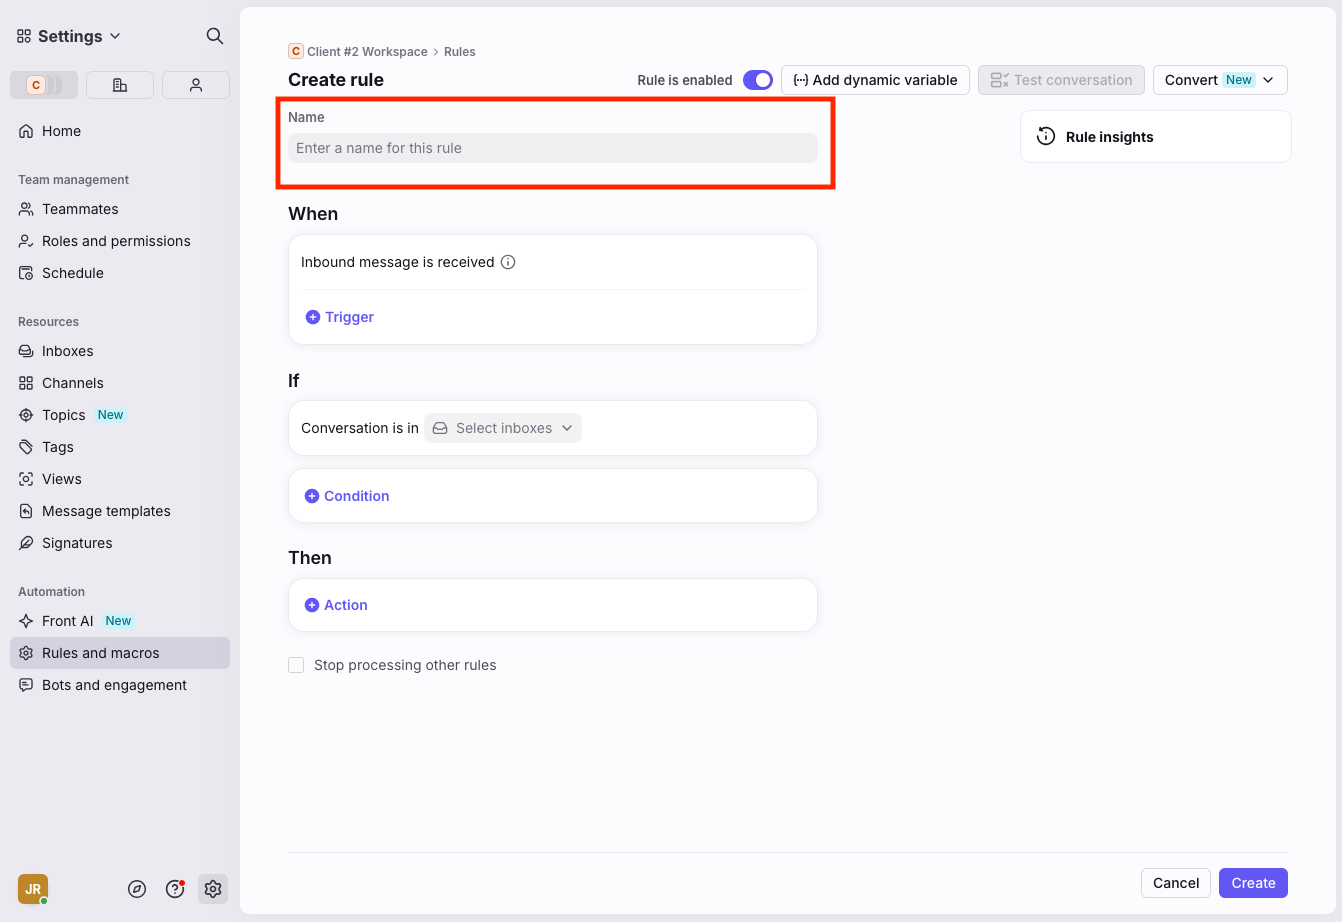
Name the rule descriptively (e.g., Auto-Response for Spring Campaign).
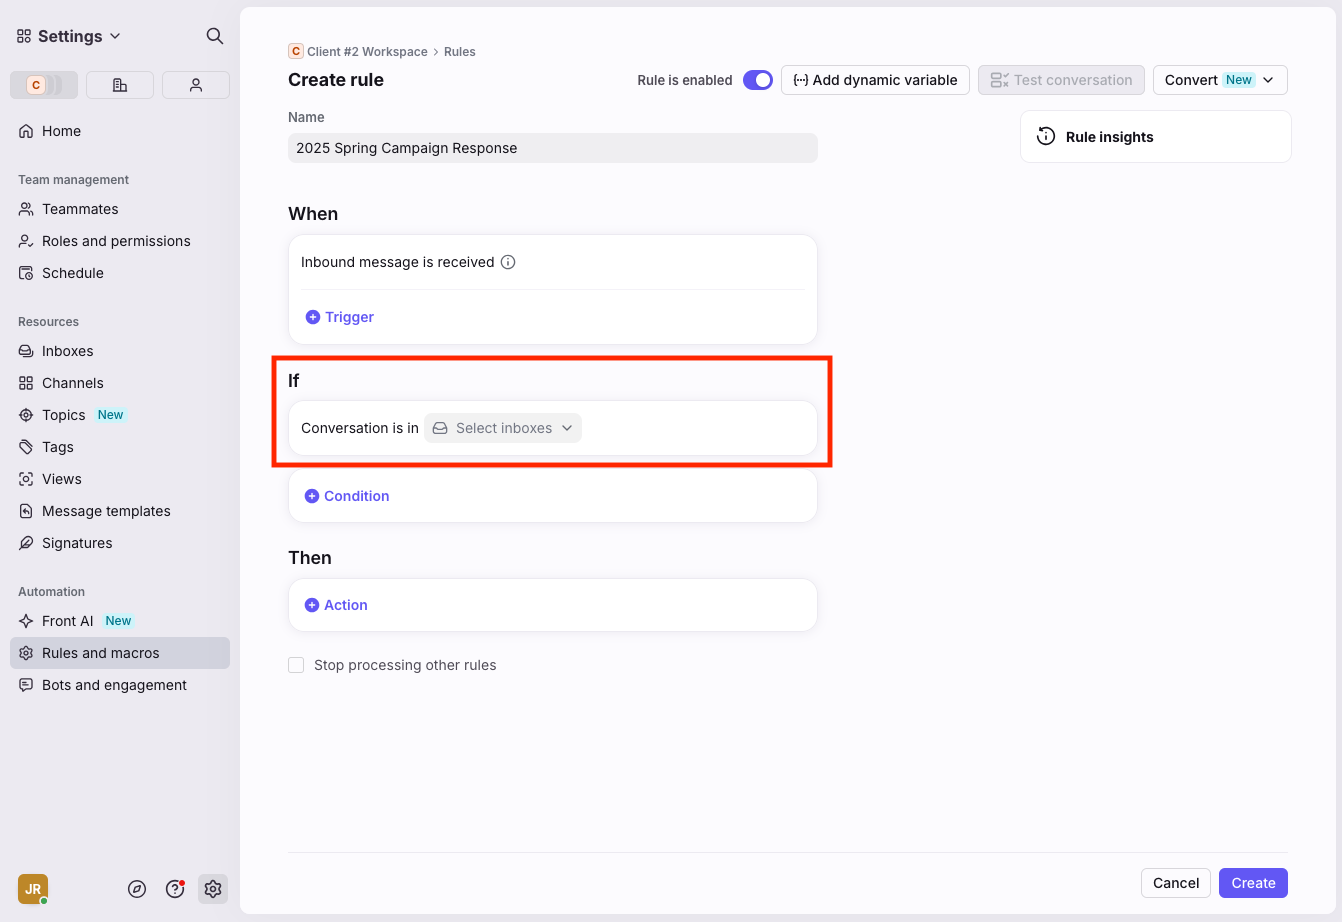
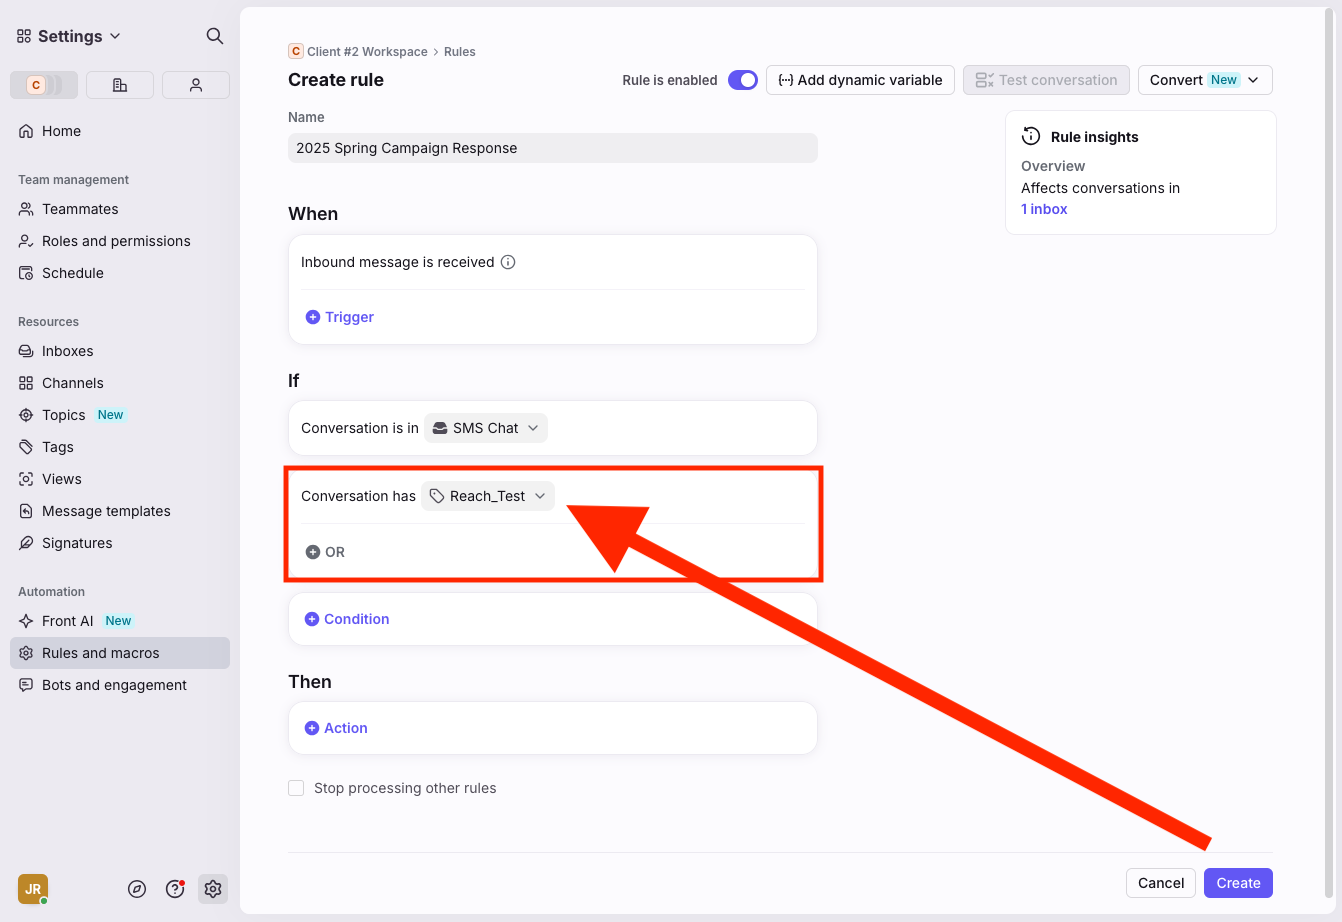
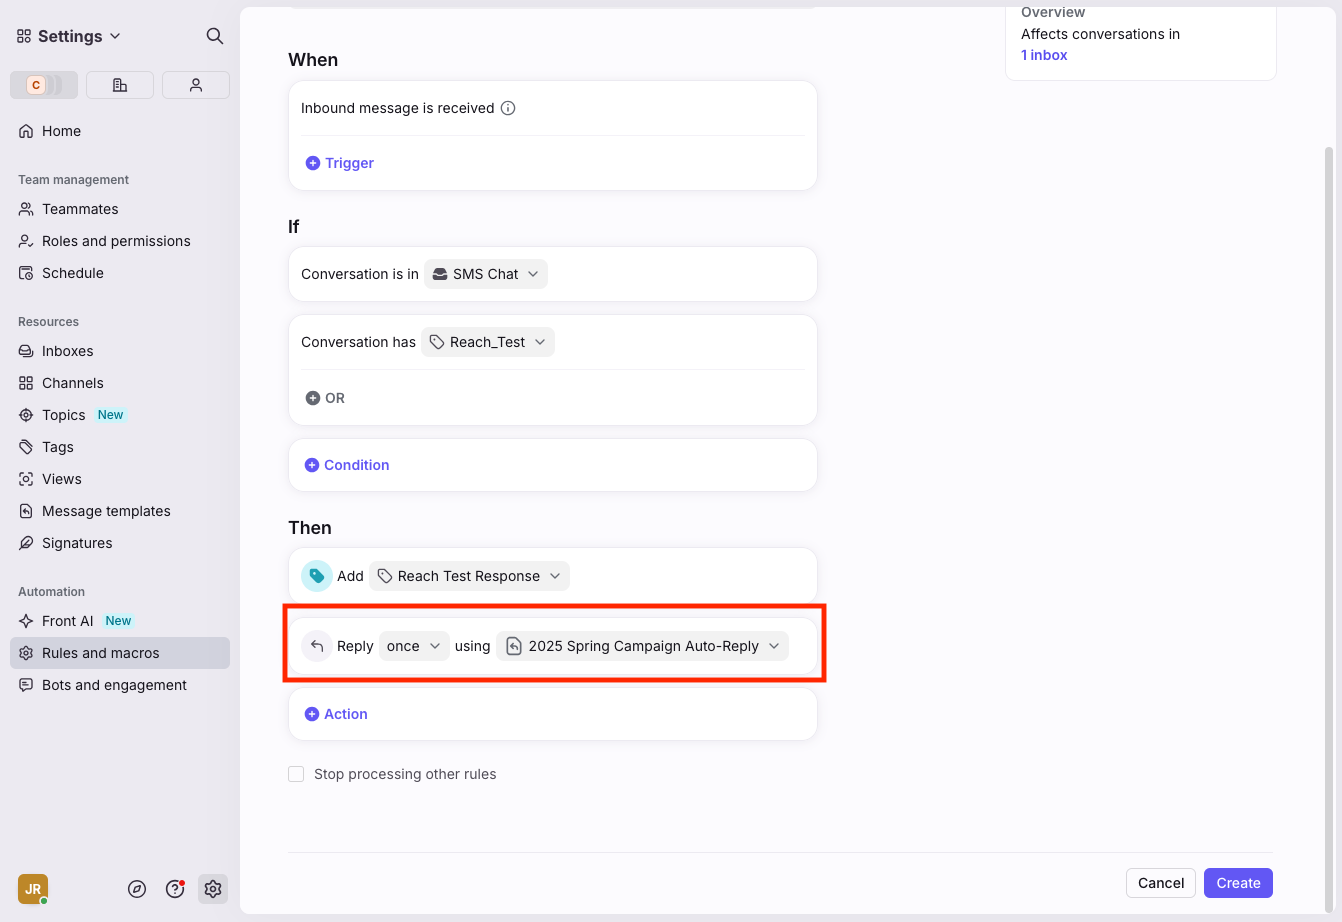
For the If condition:
Under Select Inboxes, choose GOCare Reach SMS (or your Email inbox).
Create a new condition: Conversation has specific tags.
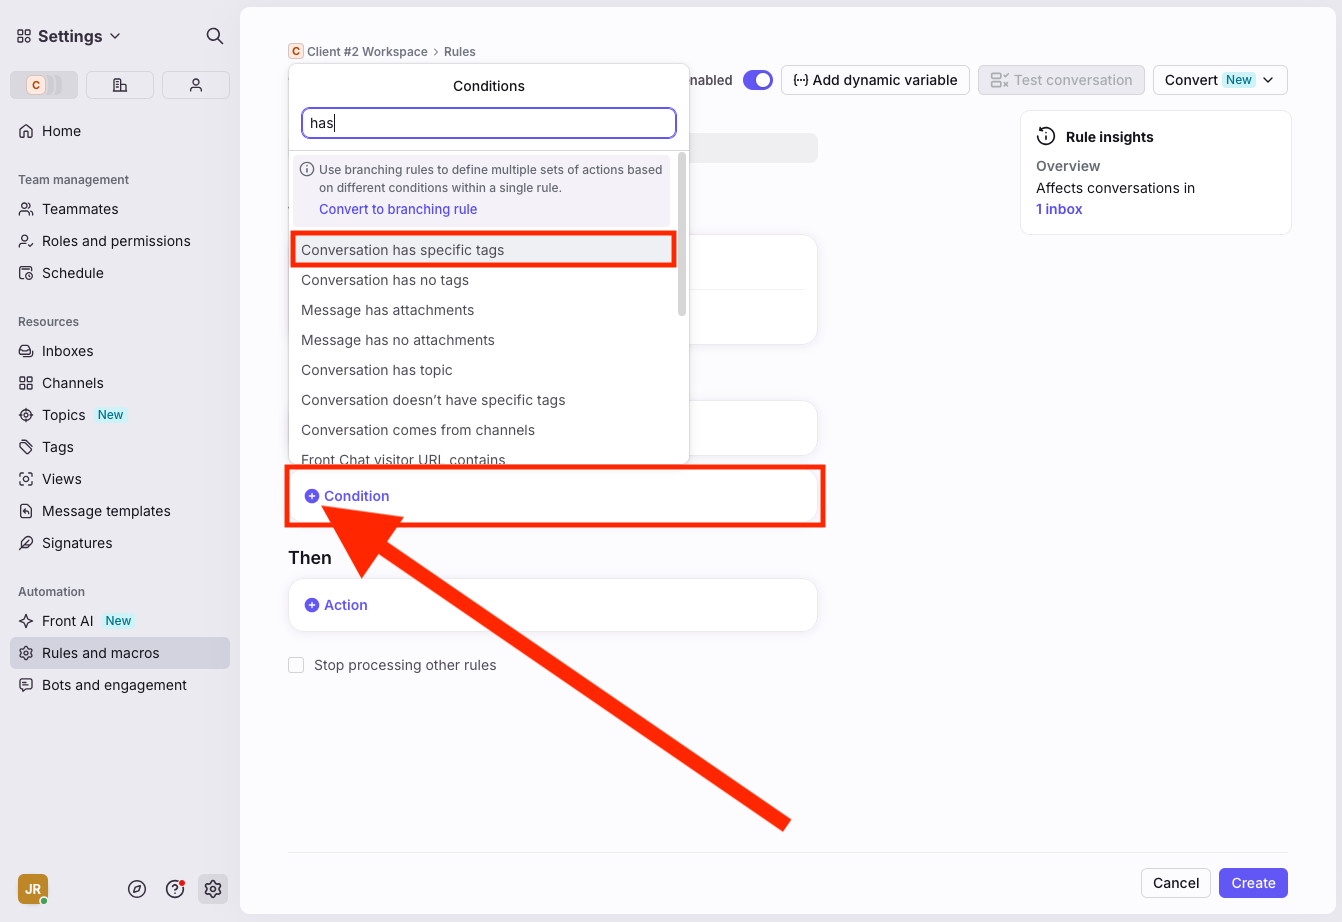
Choose the campaign tag you applied earlier.
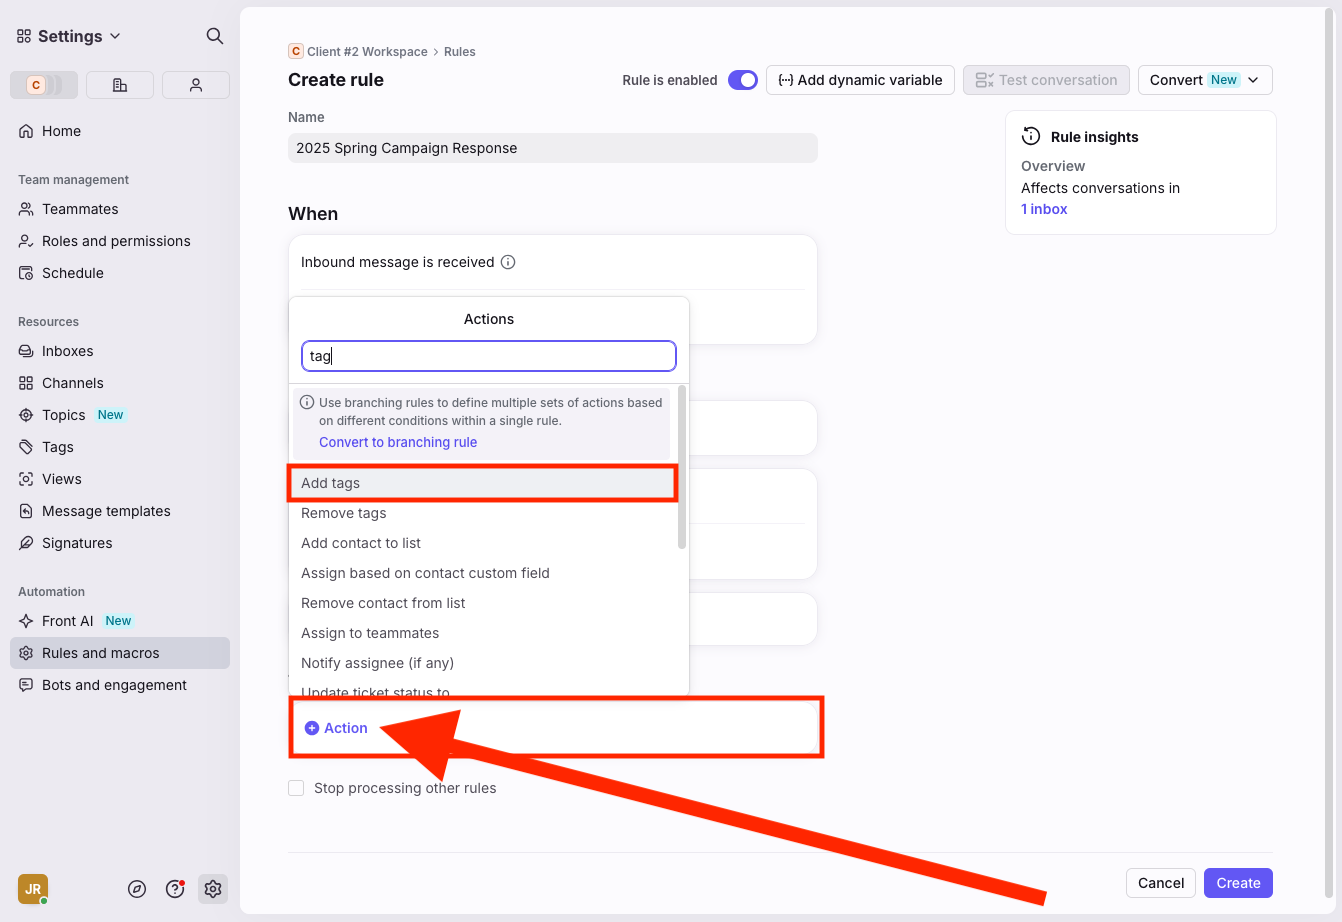
For the Then condition:
Select Add tag.
Choose your desired response tag (follow Step 3: Tag your campaign if creating a new tag)
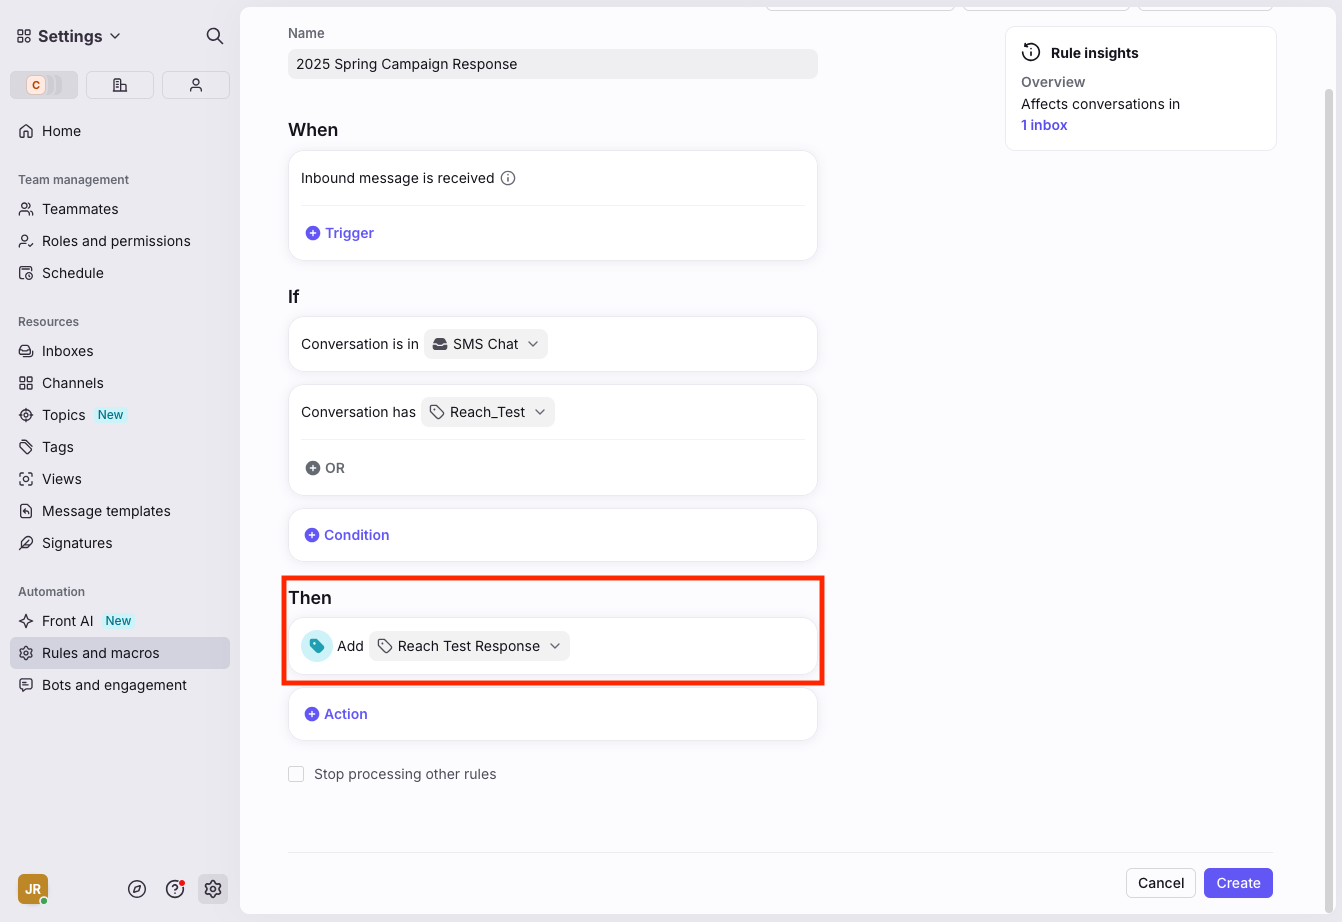
In the Then section, create an additional action: Reply using message template.
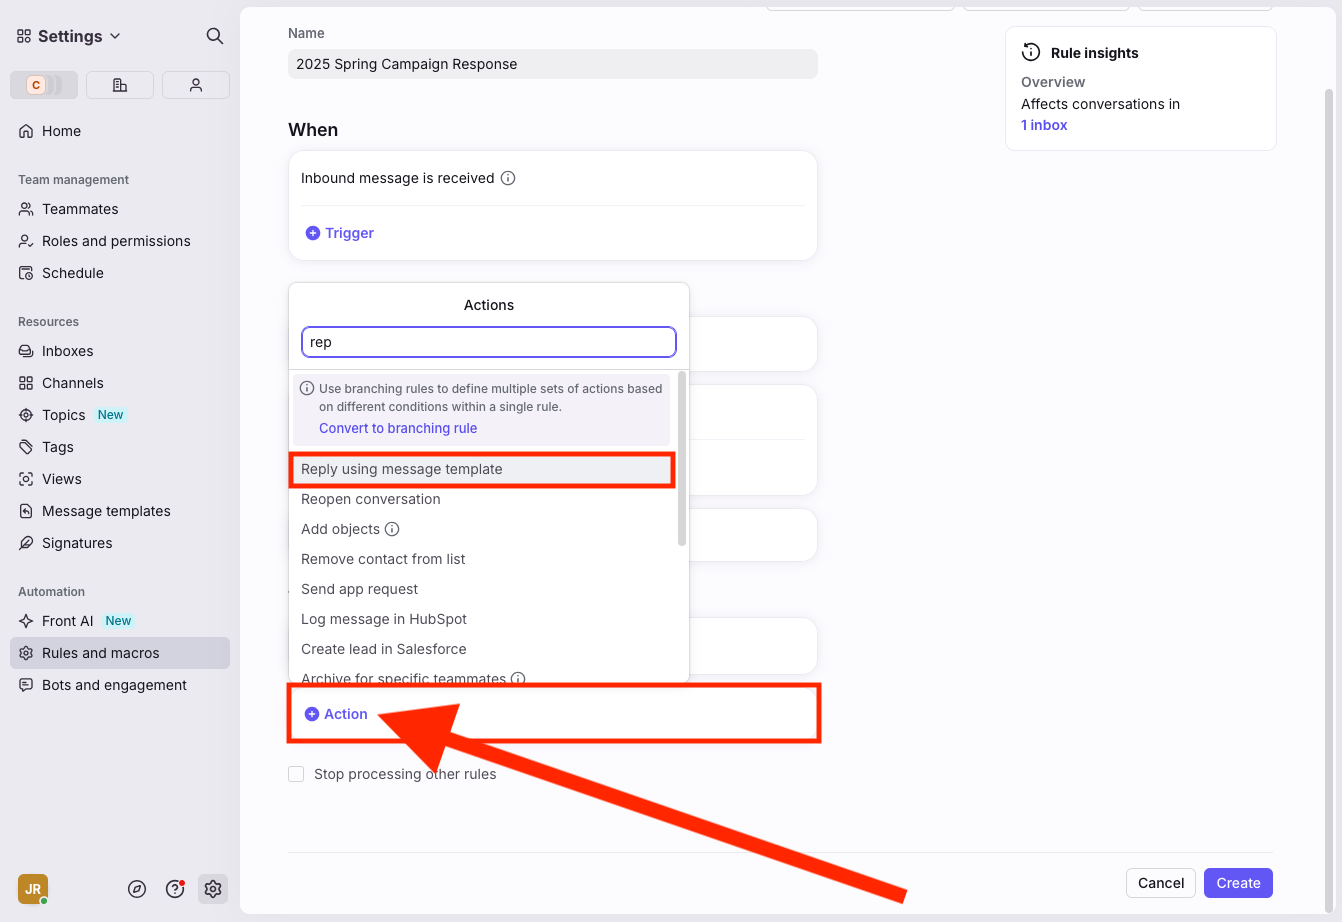
Select your new auto-response template.
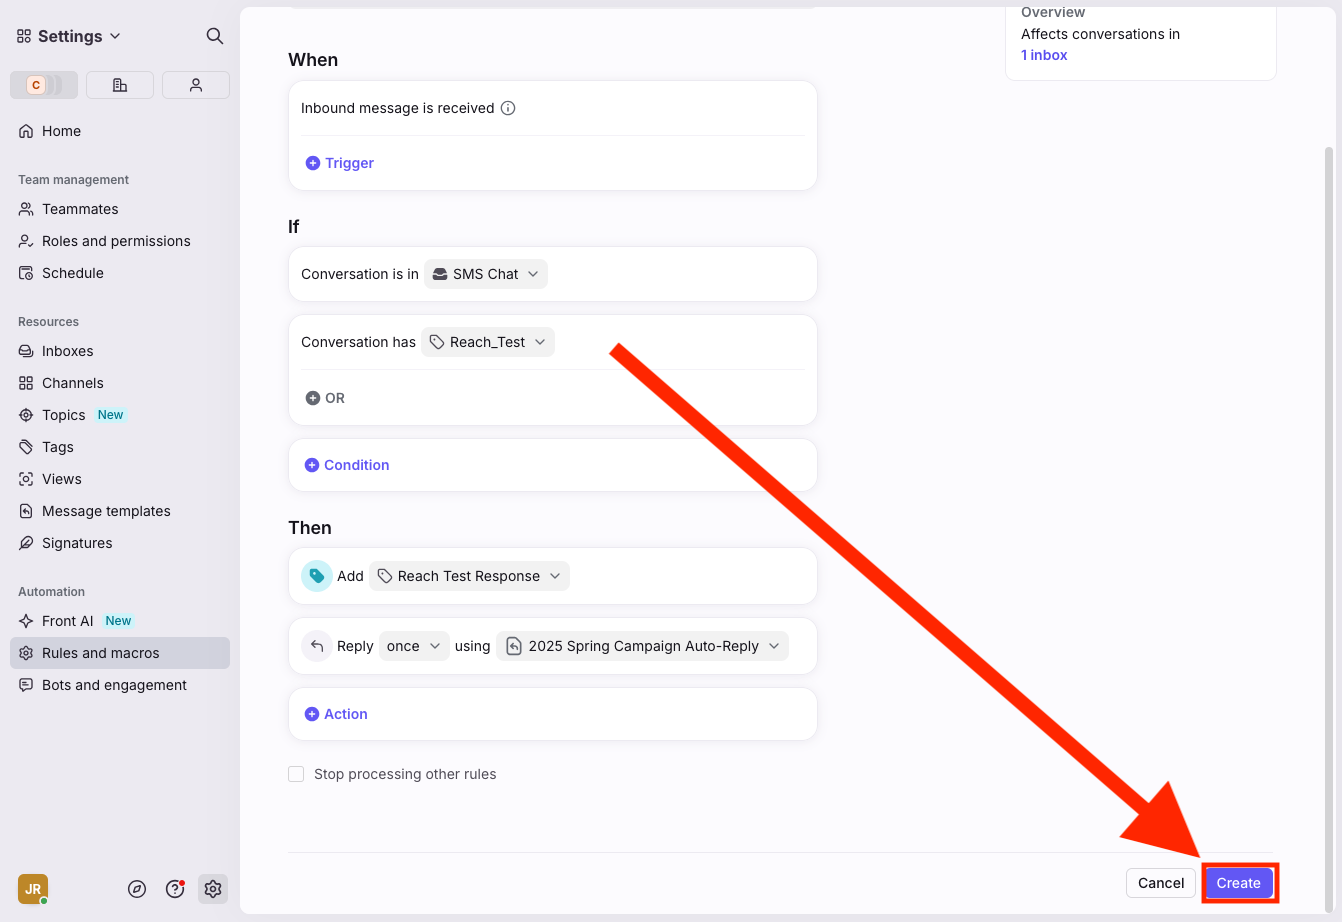
Click Create.
ℹ️ Info: Tagging and auto-responses are optional but highly recommended for campaigns expecting replies. They make it easier to track engagement and assign follow-ups if needed.